Skip to comments.
Home gardening offers ways to trim grocery costs [Survival Today, an on going thread]
Dallas News.com ^
| March 14th, 2008
| DEAN FOSDICK
Posted on 03/23/2008 11:36:40 PM PDT by nw_arizona_granny
Americans finding soaring food prices hard to stomach can battle back by growing their own food. [Click image for a larger version] Dean Fosdick Dean Fosdick
Home vegetable gardens appear to be booming as a result of the twin movements to eat local and pinch pennies.
At the Southeastern Flower Show in Atlanta this winter, D. Landreth Seed Co. of New Freedom, Pa., sold three to four times more seed packets than last year, says Barb Melera, president. "This is the first time I've ever heard people say, 'I can grow this more cheaply than I can buy it in the supermarket.' That's a 180-degree turn from the norm."
Roger Doiron, a gardener and fresh-food advocate from Scarborough, Maine, said he turned $85 worth of seeds into more than six months of vegetables for his family of five.
A year later, he says, the family still had "several quarts of tomato sauce, bags of mixed vegetables and ice-cube trays of pesto in the freezer; 20 heads of garlic, a five-gallon crock of sauerkraut, more homegrown hot-pepper sauce than one family could comfortably eat in a year and three sorts of squash, which we make into soups, stews and bread."
[snipped]
She compares the current period of market uncertainty with that of the early- to mid-20th century when the concept of victory gardens became popular.
"A lot of companies during the world wars and the Great Depression era encouraged vegetable gardening as a way of addressing layoffs, reduced wages and such," she says. "Some companies, like U.S. Steel, made gardens available at the workplace. Railroads provided easements they'd rent to employees and others for gardening."
(Excerpt) Read more at dallasnews.com ...
TOPICS: Food; Gardening
KEYWORDS: atlasshrugged; atlasshrugs; celiac; celiacs; comingdarkness; difficulttimes; diy; emergencyprep; endtimes; food; foodie; foodies; free; freeperkitchen; freepingforsurvival; garden; gardening; gf; gluten; glutenfree; granny; lastdays; makeyourownmixes; mix; mixes; naturaldisasters; nwarizonagranny; obamanomics; operationthrift; prep; preparedness; prepper; preps; recipe; stinkbait; survival; survivallist; survivalplans; survivaltoday; survivingsocialism; teotwawki; victory; victorygardens; wcgnascarthread; zaq
Navigation: use the links below to view more comments.
first previous 1-20 ... 9,041-9,060, 9,061-9,080, 9,081-9,100 ... 10,021-10,039 next last
To: All
http://bearmedicineherbals.com/?cat=7&paged=3
Yucca Petal Yumminess
Published by Kiva Rose under From the Hearth
Yucca Petal Pasta:
Lemony Yucca Petals With Pasta, Sunflower Seeds & Arugula
One of the many wonders of Spring in the Southwest is the annual blooming of the banana yuccas. These amazing plants have stiff stiletto shaped green leaves and tall stalks that bear pale bell-shaped flowers throughout May. The creamy blossoms are pollinated by one species of moth that has specially evolved alongside the banana yucca. These yucca moths often rest within the blooms during daylight hours, so Rhiannon and I gently blow them out of the flowers as we pick them.
The taste of Yucca petals is extremely mild, reminding one of artichoke hearts. They have a lovely texture, smooth and slippery on the tongue. While some prefer to eat the petals raw in salads, I find that their flavor is better accentuated by sautéing them for just a few minutes with butter, garlic, lemon and onions.
(Serves 2 or 3)
30 -50 yucca blossoms
1 or 2 tablespoons butter
1 large yellow onion
4 cloves of garlic, minced
Juice and rind of 1 lemon
Toasted sunflower seeds, at least 1/4 cup
1 bunch arugula (or watercress)
Homemade Pasta
Extra virgin olive oil
Salt and freshly ground pepper (to taste)
First, remove the petals from the central part of the flower. Rinse the petals in a large bowl of water and then drain. Slice the onion and melt the butter over medium heat. When the butter is completely melted, cook the onion until it’s tender without being totally limp. Add the garlic and yucca petals and cook, stirring every 20 seconds for about 2 minutes (or until the petals are nearly translucent but haven’t begun to shrink). If using artichoke hearts instead, slice them into quarters and cook with onion until very hot. Turn off the heat, add the lemon juice and grated rind, cover the pan and set aside while you cook the pasta. If you’re using dried pasta rather than fresh, be sure and get it in the water well before you start the stir-fry. When the pasta is done, toss with a little butter or oil. Add the stir-fry, arugula and sunflower seeds and toss again. Salt and pepper to taste. Serve in warm bowls topped with the oil of your choice. Offer fresh Parmesan or Romano at the table alongside your favorite black olives.
Variation:
•This stir fry can also be served as an appetizer, minus the pasta. Simply arrange the stir fry on a plate with a few pieces of arugula, sliced organic carrot, a chunk of fresh Parmesan and several Calamata olives. Homemade sesame crackers and a sprinkling of toasted sunflower seeds and/or grated lemon peel are a nice touch too.
9,061
posted on
12/23/2008 12:28:16 AM PST
by
nw_arizona_granny
(http://www.freerepublic.com/focus/chat/1990507/posts?page=7451 [Survival,food,garden,crafts,and more)
To: TenthAmendmentChampion
Thank you for the offer, but not this year, must get a stove first.
9,062
posted on
12/23/2008 12:46:03 AM PST
by
nw_arizona_granny
(http://www.freerepublic.com/focus/chat/1990507/posts?page=7451 [Survival,food,garden,crafts,and more)
To: nw_arizona_granny
Bookmark and I don’t know how I missed this fascinating thread!!!
9,063
posted on
12/23/2008 12:47:30 AM PST
by
little jeremiah
(Leave illusion, come to the truth. Leave the darkness, come to the light.)
To: TenthAmendmentChampion
9,064
posted on
12/23/2008 1:24:58 AM PST
by
JDoutrider
(Heading to Galt's Gulch... It is time.)
To: All
http://www.thenourishinggourmet.com/2008/11/turkey-or-chicken-apple-sausage.html
A kind reader, Sarah, recently sent a recipe she had created for chicken apple sausages, and I knew I had to try them! Because of all of the ground turkey available right now, I decided to try it with ground turkey. These sausages are lightly spiced, with little bursts of sweetness from the dried apples. Very delicious! Thank you Sarah!
Sarah also mentioned that these make a much cheaper version of the expensive apple chicken sausages you see in the stores.
I thought I should share them right away because these would be perfect for a holiday brunch. Put them along side sourdough pancakes, or soaked whole grain pancakes, scrambled eggs, and gingerbread muffins (or what about pumpkin muffins?), and you have a tasty and nourishing meal!
They also would make an excellent meat for a lunch or dinner. You could even leave the sausage unformed, and cook it up to use in different recipes. There are a lot of possibilities for this recipe!
I hope everyone’s Thanksgiving preparations are going well. I will be making my pumpkin pie on Wednesday, and finishing a few little projects on Thursday, so all I need to do today is go grocery shopping.
Enjoy your holiday (and these wonderful sausages too!)
Turkey (or Chicken) Apple Sausages
I tried making these into large sausages at one point, and they were much harder to get to cook all the way through. I found the way to go was making small breakfast size sausages. I also messed up and only used two teaspoons of sage, but I think they would be even better with the two tablespoons!
1 lb ground organic turkey or chicken (thighs work great)
3/4 C diced organic dried apples
1 tbsp maple syrup or honey
1 tsp ground black pepper
1 tsp sea salt
1/4 tsp Allspice (Sarah’s note: a little goes a long way - I think this is the secret ingredient that makes them taste SOOO good!)
2 tablespoons dried Sage
Mix all ingredients well in a medium size bowl. You will find your hands work the best in mixing ground meat. Preheat a large pan with enough coconut oil or olive oil to cover the bottom. Shape the patties into small patties (I found that two tablespoons worth of the mixture, flattened, made a nice size patty that cooked easily.) Cook until one side is crusty and browned, and it looks like it is cooked half way up the sausage, turn over, and cook until the other side is browned as well. You may have to cook these in several batches. Just make sure the middle is cooked and serve!
Posted by Kimi Harri
9,065
posted on
12/23/2008 3:40:27 AM PST
by
nw_arizona_granny
(http://www.freerepublic.com/focus/chat/1990507/posts?page=7451 [Survival,food,garden,crafts,and more)
To: little jeremiah
Hello Stranger, glad you finally found us.
If I did not ping you in the beginning, then please forgive me, as I fully intended to do so.
I was thinking of you today, reading about a Polish spy and the good he did as a double agent.
Do join in and have fun with us, as we wander around and learn all kinds of new things and some old ways too.
Merry Christmas to you and your family.
9,066
posted on
12/23/2008 3:50:26 AM PST
by
nw_arizona_granny
(http://www.freerepublic.com/focus/chat/1990507/posts?page=7451 [Survival,food,garden,crafts,and more)
To: All
http://www.thenourishinggourmet.com/search/label/Gluten%20Free
Quick and Easy Homemade Marinara Sauce
This easy to make marinara sauce is seasoned with basil, onions, and garlic and laced with wine. This is the sauce that convinced my husband that spaghetti sauce does not need to be sweetened (he has gladly thrown out those Prego spaghetti sauce jars in exchange for this one!).
Although it is a full flavored sauce, is it quite simple and fast to make. It’s the time of year for Christmas baking and shopping, card writing, and relative visiting. In other words, we are busy! It can be tempting to fudge a bit on our healthy cooking, but there are easy, nourishing dinners that you can throw together quickly.
This easy to make marinara sauce is quick to throw together after a busy day and makes a wonderful main dish when poured over some spaghetti noodles (perhaps with meatballs and Parmesan cheese). To keep things easy you can use brown rice noodles (low in phytic acid, read more about soaking grains here), or you can use my soaked noodle recipe. I have been getting my brown rice noodles at Trader Jo’s (2 dollars a package!).
We use this sauce as part of many other dishes, but we love it simply tossed with some hot noodles. Serve with a green salad and some garlic bread and you have a gourmet meal that is nourishing and easy as well.
Enjoy!
Quick and Easy Homemade Marinara Sauce
I use whatever wine I have on hand. I have used white and red with good success (though red is probably a more natural fit). Just make sure you use drinking wine (those cheap cooking wines aren’t worth having in your kitchen!). You can adjust the wine amount to personal preference, sometimes I don’t even measure, but pour to taste. You can also easily use other herbs, or fresh herbs. I often use this as the foundation for more elaborate sauces.
2-3 tablespoons extra virgin olive oil
1 onion, peeled and chopped
3-6 garlic cloves, peeled and finely chopped
1 28 ounce jar of purred or chopped tomatoes
2 teaspoons dried basil
1/2 cup of wine
Sea salt and pepper to taste
1-Heat a pan on medium high heat with the olive oil. When hot add the onion. Saute, stirring occasionally until the onions are soft and transparent. Then add the garlic and saute 1-2 minutes more (don’t let it brown).
2-Add the tomatoes, basil, and wine, and bring to a low simmer. Simmer for about 10 minutes, taste test and add salt if needed (by the way, it will taste much more “winey” before it pour it over the noodles. The noodles dilute the flavor a bit).
Serve as desired (with noodles, polenta, etc).
Posted by Kimi Harris
9,067
posted on
12/23/2008 3:56:19 AM PST
by
nw_arizona_granny
(http://www.freerepublic.com/focus/chat/1990507/posts?page=7451 [Survival,food,garden,crafts,and more)
To: All
Mexican Roasted Potatoes
These flavorful potatoes highlight oregano, cumin, and garlic with a light kick from cayenne pepper. To finish things off, lime juice is splashed over the steaming hot potatoes, adding another layer of flavor. Delicious and flavorful they make a fun change from our usual Spanish rice.
You can eat these as a simple side, or you could also use them as a flavorful part of a more complicated Mexican dish.
Here are a few ideas.1-Wrapped in a burrito with black beans, lettuce, salsa, sour cream, and avacado. 2- Wrapped in a burrito with flavorful Mexican beef with your choice of toppings. 3- Use leftovers potatoes to add to scrambled eggs, and top with salsa. I am sure I am missing many ideas, but there are a few to get you started.
Another plus to this dish is that it’s a cinch to make, nourishing, and frugal too, (It’s also a great way to use up those spare potatoes not used for Thanksgiving’s mashed potatoes!).
Mexican Roasted Potatoes
By the way, the Dijon style mustard is totally not culturally accurate, but it adds a wonderful element so I couldn’t help add it in. You could add more heat by increasing the cayenne powder, for those who like things spicy.
8 medium potatoes, peeled and dice
1/3 cup of olive oil
2 teaspoons dried oregano
1 teaspoon ground cumin
1/2 teaspoon sea salt (plus more to sprinkle on top)
freshly ground black pepper
3 garlic cloves, minced
1/8 teaspoon cayenne powder
1 tablespoon Dijon style mustard
1 lime, juiced (or more to taste)
1-Preheat the oven to 400 degrees.
2-Combine all of the ingredients, except the potatoes and lime in a jar and shake to thoroughly mix ingredients (or whisk in a bowl).
3-Pour your diced potatoes into a jelly roll pan, and toss with the oil mixture. Sprinkle with salt and freshly ground pepper.
4-Roast for about 40 minutes, until the potatoes are well cooked, and browning on the edges. Take out of the oven, and sprinkle the juice of one lime over it. Taste test, and add more lime juice or salt, if needed and serve.
This post is part of Works for Me Wednesday!
Posted by Kimi Harris
http://www.thenourishinggourmet.com/search/label/Gluten%20Free
9,068
posted on
12/23/2008 3:59:23 AM PST
by
nw_arizona_granny
(http://www.freerepublic.com/focus/chat/1990507/posts?page=7451 [Survival,food,garden,crafts,and more)
To: All
http://www.thenourishinggourmet.com/search/label/Gluten%20Free
Maple Sugar Candied Nuts
I hope that everyone had a very wonderful Thanksgiving meal. We had a lovely meal, fun times with family, and pumpkin and apple pie. I also got a very special birthday present, in the form of a new camera (everyone had gone in together to buy it for me! Isn’t that so sweet?). I have been learning the ropes with it this morning, and hopefully soon I will have some food pictures to share with you all. (I’ve been using a point and shoot camera all this time).
Meanwhile, I wanted to share a deliciously sweet maple sugar candied nut recipe that we greatly enjoyed yesterday. We used these in a salad yesterday, and they were so nice. I also, admittedly snacked on them while waiting for the rest of the meal to finish up. The maple sugar gives a depth of flavor that white sugar definitely lacks and the little bit of salt balances the sweet.
These go perfectly in a salad, because they are sweet enough to hold up against an aggressive vinaigrette. These are “special occasion” nuts because maple sugar isn’t the cheapest sugar to use. You could also consider using Wilderness Family Natural’s muscovado sugar for a more robust sweetened nut.
Maple Sugar Candied Nuts
1 egg white
3/4 cup of maple sugar
1/2 teaspoon high quality sea salt
2 1/2 cups of walnuts, pecans, or nut of choice.
1-Preheat the oven to 325 degrees
2-Whisk the egg white in a medium size bowl until all of the egg white is foamy and no liquid remains. Then stir in the maple sugar and salt.
3-Add the nuts, and stir until the egg white/sugar mixture evenly coats the nuts.
4-Spread on a greased cookie sheet in an even single layer. The nuts should be separate from each other to cook properly.
5-Stick in the oven and cook until the nuts are golden brown, and the egg white/ sugar mixture has hardened slightly (it will harden more after you remove it from the oven). This will take about 10-15 minutes.
6-Remove from the pan, right away, and place on a plate to cool.
Enjoy these sweet nuts in salads or as a sweet snack.
Posted by Kimi Harris
9,069
posted on
12/23/2008 4:01:20 AM PST
by
nw_arizona_granny
(http://www.freerepublic.com/focus/chat/1990507/posts?page=7451 [Survival,food,garden,crafts,and more)
To: All
Chocolate Coconut Milk Ice Cream (with coconut sugar)
One of our all time favorite recipes is chocolate coconut milk ice cream. Chocolate is always a favorite around here and the coconut milk makes it incredibly smooth and rich. This time I used coconut sugar to sweeten it, and it turned out wonderfully! If you haven’t heard of this sweetener before, check out my post about it here.
This recipe is dairy and cane sugar free, so it’s also great for those with allergies. But it would be wonderful made with cream instead of coconut milk as well. Other possible additions would be egg yolks (for flavor, nutrition, and richness), arrowroot powder (for texture), or vodka to prevent it from freezing solid.
However, one thing that is great about making coconut milk ice cream that doesn’t contain something like pumpkin or berries added, is that it is so creamy it doesn’t freeze into such a hard brick. Our ice cream was still fairly scoopable after a day or two in our freezer. Though it was truthfully hard to make it last that long!
By the way, I used agave in the past to sweeten this ice cream because it was the only sweetener (besides stevia) that my body didn’t have problems with. But it has been many months since I have bought agave because as soon as I was healed enough I switched over to sweeteners I was more comfortable with (such as raw honey and maple syrup). You’ve probably noticed that change in my more recent recipes. And now, of course, I am experimenting with coconut sugar!
I hope you enjoy this creamy cold treat as much as we do!
Chocolate Coconut Milk Ice Cream
Honey or maple syrup used in this recipe is also very good. Just use a little less then you would for the coconut sugar.
2 14 oz cans of coconut milk (not lite! I used the brand Thai Kitchen)
1/3 cup of coconut sugar, plus two tablespoons (I used the more wet, pasty type found in a jar)
2/3 cup of cocoa powder
1 teaspoon vanilla extract
a dash of sea salt
Combine all of the ingredients together in a large bowl, and blend with an immersion blender (or you could use a regular blender or food processor, perhaps). Make according to your ice cream maker’s instructions. Let ripen in the freezer for a couple of hours and enjoy.
Posted by Kimi Harri
http://www.thenourishinggourmet.com/search/label/Gluten%20Free
9,070
posted on
12/23/2008 4:03:34 AM PST
by
nw_arizona_granny
(http://www.freerepublic.com/focus/chat/1990507/posts?page=7451 [Survival,food,garden,crafts,and more)
To: All
http://www.thenourishinggourmet.com/search/label/Gluten%20Free
Maple, Honey Pumpkin Pie (with Coconut Milk)
This rich, deliciously spiced pumpkin pie contains luscious coconut milk, and is sweetened with dark maple syrup and sweet honey. The result is a decadent pie that is moist and sweet, with loads of flavor from the spices.
Yummmmmmm......
This is my contribution to the Nourishing Holiday Food Carnival!
A few notes on the recipe:
I have included the brand name of the coconut milk I used just because different brands vary in thickness. You can substitute a different brand, but make sure it is a very thick coconut milk, otherwise your pie may be watery. I bet that you could also substitute heavy whipping cream with good results as well.
I used both honey and maple syrup to sweeten this pie because both add a different element. The grade B maple syrup adds a deep maple flavor that goes so perfectly with pumpkin pie. The honey adds more sweetness. Using them straight, however, would make your pie too soft, so there is one added step of simmering the honey and maple syrup into a thicker syrup before combining it with the rest of the ingredients. You will find a candy thermometer helpful for this step, though not absolutely necessary.
I have not included a pie crust recipe here, but use your favorite. As Sally Fallon mentions in Nourishing Traditions, pie crust is the one exception she makes by making it with white flour. You could also use sprouted flour. To make it dairy free use either lard or expeller pressed palm oil. I used my trusty Joy of Cooking pie crust recipe, using spectrum’s non hydrogenated shortening (which is expeller pressed palm oil). To make a gluten free pie, you could easily substitute a gluten free pie crust (I would say that a shortbread, press- in- the- pan type pie crust would be easier to deal with), or just leave the crust off entirely!
Unbaked, waiting to go into the oven
Maple, Honey Pumpkin Pie (with Coconut Milk)
This pie is slightly softer than some pies. I like to make it the day before because it leaves plenty of time to set and allows the spices to release their full potential of flavor. I used a 9 1/2 inch pie tin. Please be careful when cooking the honey and maple syrup. Sugary syrups like this are very dangerous when hot. Use caution and common sense. (I make this pie during nap time so that baby isn’t around)
2 cups of pumpkin Puree
1 14 oz can of Thai Kitchen Coconut Milk (not lite)
2 eggs
2 teaspoons cinnamon
1 teaspoon ginger
1/4 teaspoon cloves
1/4 teaspoon nutmeg
1/4 teaspoon cardamon
1/2 teaspoon salt
1/2 cup of honey
1/2 cup of grade b maple syrup
1 good pie crust
1-Have your pie crust rolled out and in the pie tin. Preheat the oven to 375 degrees.
2-Mix all of the ingredients together in a medium size bowl, except the honey and maple syrup. Set aside
3- Combine the honey and maple in a small pot. Bring to a gentle simmer. Make sure it doesn’t boil over! Let it simmer until the mixture reaches the soft ball stage (the temperature should be between 234-242 degrees). To check it, drop a small amount of the syrup with a warm wooden or metal spoon into cold water. Quickly gather the syrup in between your fingers, at the soft ball stage it will be a limp sticky ball that flattens between your fingers when removed from the water. I find it helpful to check at least several times as the temperature gets close. If you are new at this, you may want to take the pot off of the heat while you check it.
4-When it is done, allow it to cool for about 5 minutes and then add to the rest of the ingredients. Mix thoroughly, and pour into the pie crust.
5-Place in the middle of the oven and bake until the center is set (it will still seem quivery, like gelatin, when you nudge the pan). 45 minutes to 1 hour is the usual time. Let cool completely and then refrigerate. Enjoy!
Posted by Kimi Harris
9,071
posted on
12/23/2008 4:07:07 AM PST
by
nw_arizona_granny
(http://www.freerepublic.com/focus/chat/1990507/posts?page=7451 [Survival,food,garden,crafts,and more)
To: All
http://www.thenourishinggourmet.com/search/label/Gluten%20Free
World’s Best Braised Cabbage
Don’t stick your nose up at the humble cabbage because braised cabbage, with carrots and onion, deserves high praise. The long, low heat cooking draws out the sweetness of the cabbage, carrots and onions while making it deliciously soft. Taking the foil off at the end and upping the heat produces nicely browned edges. It truly is delicious. We have made this recipe for years and like it so much we will often eat most of a pan ourselves!
This is a wonderful example of how a cooking method can produce superior results. And might I add that these ingredients are frugal as well as nourishing?
This is the recipe I have chosen to showcase from the cookbook, All about Braising by Molly Stevens. This book has some of the most wonderful sounding, slow cookin’ goodness recipes. From vegetable to beef, to chicken, to fish, this book has a wide variety of dishes. Most of the recipes are quite easy to put together they just need oven time. Slow cooked meals are perfect for this time of year. She also has very easy to follow directions, which is always greatly appreciatied.
(Speaking of this time of year, don’t forget about the Nourishing Holiday Food Carnival coming up this Tuesday!)
My notes to this recipe: Definitely follow the directions for the size of cabbage to use. If you use too big of one, it will not cook correctly. I also like to add several extra carrots, just because they are so delicious.
World’s Best Braised Cabbage, by Molly Stevens
1 Medium head green cabbage (about 2 pounds)
1 large yellow onion (about 8 ounces)
1 large carrot, cut into 1/4 inch rounds
1/4 cup chicken stock, homemade or store-bought, or water
1/4 cup extra-virgin olive oil
Coarse salt and freshly ground black peper
1/8 teaspoon crushed red pepper flakes, or to taste
Fleur de sel or coarse sea salt
1-Heat the oven to 325. Lightly oil a large gratin dish or a baking dish (9 by 13 inch works well).
2-Trimming the cabbage: Peel off and discard any bruised or ragged outer leaves from the cabbage. The cabbage should weigh close to 2 pounds (if you don’t have a kitchen scale, consult the grocery store receipt). If the cabbage weighs more than 2 pounds, it won’t fit in the baking dish and won’t braise as beautifully. To remedy this, cut away a wedge of the cabbage to trim it down to size. Save the leftover wedge for salad or coleslaw. Then cut teh cabbage into 8 wedges. Arrange the wedges in teh baking dish, they may overlap some, but do your best to make a single layer.
3-The Braise:Scatter in the onion and carrot. Drizzle over the oil and stock or water. Season with salt, pepper, and the pepper flakes. Cover tightly with foil, and slide into the middle of the oven to braise until the vegetables are completely tender, about 2 hours. Turn the cabbage wedges with tongs after an hour. Don’t worry if the wedges want to fall apart as you turn them: just do your best to keep them intact. If the dish is drying out at all, add a few tablespoons of water.
4-The finish: Once the cabbage is completely tender, remove the foil, increase the oven heat to 400, and roast until the vegetables begin to brown, another 15 minutes or so. SErve warm or at room temperature, sprinkled with fleur de sel or other coarse salt.
Variation: Braised gren cabbage with Balsamic vinegar
I sometimes add a splash of balsamic vinegar to the cabbage to enhance it’s sweetness. In step 4, after you remove the foil, sprinkle on 1 1/2 tablespoons balsamic and turn the cabbage with tongs to distribute the vinegar, then roast for another 15 minutes, uncovered as directed.
Posted by Kimi Harris
9,072
posted on
12/23/2008 4:11:05 AM PST
by
nw_arizona_granny
(http://www.freerepublic.com/focus/chat/1990507/posts?page=7451 [Survival,food,garden,crafts,and more)
To: All
[There are other gluten free recipes at this link]
http://www.thenourishinggourmet.com/search/label/Gluten%20Free
Decadent Pumpkin Pie Ice Cream
Pure Indulgence.
I wasn’t even sure if I would like pumpkin pie ice cream. I liked pumpkin pie, and I liked ice cream, but would the two mix? But it was such an intriguing idea (the idea given to me from a naturopath), I knew I had too at least try it.
This maple sweetened, spiced pumpkin pie ice cream is heavenly. It really truly is. The coconut milk makes it very creamy, and the spiced pumpkin, permeated with maple syrup brings you rushing towards Thanksgiving with one bite. And doesn’t it have a beautiful color?!
Enjoy.
My only complaint with homemade ice cream in general, is that if you don’t use a tablespoon or two of vodka in it, it will freeze quite hard in 24 hours. The vodka keeps it softer. (I really should just go buy some vodka for ice cream making, I normally don’t have it.) So this ice cream is best when allowed to ripen just a few hours in the freezer. If you do let it freeze longer, expect to let it defrost it a bit before trying to scope any out.
Other possible additions for the ice cream would be egg yolks (adds creaminess and a rich flavor) or arrowroot (for texture). You dairy people could also try substituting cream for the coconut milk. I know it would be delicious that way too.
Regardless, if you like pumpkin pie, I bet you would like this ice cream!
Pumpkin Pie Ice Cream-with Coconut Milk
As always, I suggest using Thai’s coconut milk (not lite). You can use grade A maple syrup, but it won’t have the pronounced maple flavor of grade B.
1 1/2 cup of pumpkin puree
1 14 oz can of coconut milk, not lite and unsweetened
1/2 cup of grade B maple syrup (you can add more to taste, if you like your ice cream very sweet)
3/4 teaspoon cinnamon
1/4 teaspoon nutmeg, freshly ground if possible
1/4 teaspoon cloves
dash of salt
Combine well together, and make according to your ice cream maker’s direction. Let ripen several hours in the freezer and serve.
I am entering this post to be part of Sugar High Friday, with the theme of spices. This spice combination is one of my all time favorites. What could be more satisfying and warming?
Posted by Kimi Harris
9,073
posted on
12/23/2008 4:16:22 AM PST
by
nw_arizona_granny
(http://www.freerepublic.com/focus/chat/1990507/posts?page=7451 [Survival,food,garden,crafts,and more)
To: All
http://www.thenourishinggourmet.com/search/label/Gluten%20Free
Butternut Squash Fries
Fries, anyone?
I think it was Carrie, who mentioned squash fries in a post as something she wanted to try. They immediately caught my interest, as they seemed such a fun way to eat squash. It was a huge hit here. They are softer, and not firm like a potato fry would be. But they really have a beautiful taste, and my husband and daughter just love them. In fact, I never seem to have made enough!
So for my addition to the Nourishing Fall Recipe Carnival, I thought I would share with you Butternut Squash Fries. I think it fits the bill quite nicely. They are a frugal side dish to boot!
I am sure you can use other squash, but I like butternut because it has the right shape for cutting fries out of, and it is nice and firm. I am sure that there are many variations to be had for this recipe. You could try sprinkling some warming spices on, like cinnamon and nutmeg. Or you could spice it up with some curry powder. And these are fries after all, so it’s nice to have a dipping sauce. I made a simple one by adding a few tablespoons of grade B maple syrup to homemade mayonnaise. Rich and Delish! My sister suggested curried mayonnaise, another great idea.
I struggled for a long time in figuring out how to cut up and peel a butternut squash in a timely fashion. I have finally worked out a system that has worked well for me, so I am including step by step instructions for you all.
Butternut Squash Fries
Preheat oven to 400 degrees
1 butternut squash
4 tablespoons oil (I have used coconut oil or a mixture of coconut oil and olive oil)
Sea salt and pepper
With a sharp chef’s knife, cut the ends of your squash off and cut in half.
Now cut each of your halves, in half again.
Using a spoon, remove all of the seeds from each quarter.
The squash should now be the perfect size to hold in your hand and peel. Peel each quarter, making sure that you remove all of the peel (you may have to go over every surface more than once). A sharp peeler makes this job much easier!
Now that they are peeled, you are ready to cut some more. Cut each quarter in small strips. One of the secrets to getting nice squash fries, is to get it the right size. Think of a real French Fry, that is your size goal.
Turn your strips onto their sides, and cut in half.
Cut these strips in half, to reduce length.
And you are done!
Place the cut squash in a bowl, and, if needed, melt coconut oil gently. Toss the oil with the squash and sprinkle with salt and freshly ground pepper.
The other secret to getting not overly soft squash fries is to very widely space them on your sheet pan. The ones below really were a little too close. It works best to have them far apart from each other. I would use two sheet pans for one squash, if possible.
Place in your hot oven for about 45 minutes, switching the sheet pans, half way through. This will depend on your oven and how small you cut them, so check early, and leave a time cushion if they take a little longer then you expect.
You want them to get not only well cooked, but slightly browned as well.
Enjoy!
Posted by Kimi Harris
9,074
posted on
12/23/2008 4:19:15 AM PST
by
nw_arizona_granny
(http://www.freerepublic.com/focus/chat/1990507/posts?page=7451 [Survival,food,garden,crafts,and more)
To: nw_arizona_granny
What an amazing blog that is. I bet she’d be fascinating to talk to. Such interesting people in this country!
9,075
posted on
12/23/2008 7:32:47 AM PST
by
TenthAmendmentChampion
(Join us on the best FR thread, 8000+ posts: http://www.freerepublic.com/focus/chat/1990507/posts)
To: nw_arizona_granny
http://cherrapeno.blogspot.com/2008/12/winter-cranberry-cupcakes.html Winter Cranberry Cupcakes

My mum must get so fed up with me. Whenever I pop over to see her, I always take a peek through her cookery books. She has quite a few that I don't have, and some are very old. Just after Christmas last year, I noticed that she had an old Sainsbury’s magazine on the coffee table. It had some really good ideas in it and I thought these little snowmen cupcakes were quite cute.
The cupcake mixture was not from the magazine. Instead I used a standard Victoria sponge recipe and added dried cranberries and Clementine zest to the mixture. You can substitute your favourite cupcake.
Cranberry Cupcakes
Makes approx 7-8 medium sized cupcakes
100g/4oz unsalted butter, softened
100g/ 4oz vanilla caster sugar (or use ordinary granulated sugar)
2 large eggs
100g/4oz self raising flour
100g dried sweetened cranberries
Finely grated zest of 1 Clementine
Preheat the oven to 180ºC/350ºF.
In a large bowl, cream the butter and sugar together until light and fluffy - I use an electric hand whisk.
Beat in the eggs, one at a time, adding a little flour with each egg.
Gently fold in the rest of the flour, followed by the dried cranberries and the Clementine zest. Spoon into well greased muffin cups or paper cupcake cases.
Bake for 18-20 minutes until springy to the touch. Remove from tins and cool on a wire rack.
When cool, top with white icing and decorate.
Snowman Decoration
There have been a lot of questions about the icings I used for the snowmen.
I used two different types, a ready made one (fondant in the US) and some runny icing that was made with icing sugar (powdered sugar in the US) and water.
You will need:
Some ready-to-roll icing or fondant - I used Regalice
Orange food colouring paste to colour some of the ready-to-roll icing orange for the noses
A tube of black icing for the eyes and buttons
Some red Smarties or M&M's for the hat
A couple of cups of icing sugar (powdered sugar) for the bit directly on top of the cupcake
For the head, roll bits of ready-to-roll icing/fondant (I used Regalice) into small balls which are roughly the size of a cherry tomato. Make some smaller balls for the hats.
Using orange food colouring paste, colour some ready-to-roll icing for the carrot noses and score them with a sharp knife to make them look like carrots. You also want a tube of black icing for the eyes/buttons, and some red Smarties or M & M's for the hat.

Pour a couple of cups of icing sugar (powdered sugar) into a bowl and stir in some cold water, a little at a time until you have a spreadable icing - don't make it too runny. Spread or spoon this onto the cupcake.
Pop on the head and use a little of the icing (the one you made up) to glue on the Smartie, hat and nose. Use the black icing tube for the eyes and buttons.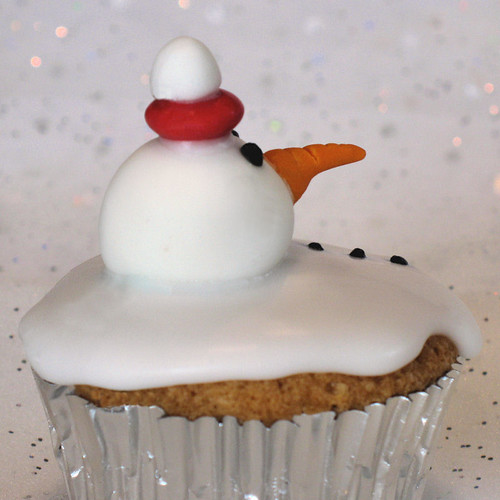
9,076
posted on
12/23/2008 9:49:57 AM PST
by
TenthAmendmentChampion
(Join us on the best FR thread, 8000+ posts: http://www.freerepublic.com/focus/chat/1990507/posts)
To: All
9,077
posted on
12/23/2008 11:00:43 AM PST
by
nw_arizona_granny
(http://www.freerepublic.com/focus/chat/1990507/posts?page=7451 [Survival,food,garden,crafts,and more)
To: TenthAmendmentChampion; All
9,078
posted on
12/23/2008 11:12:03 AM PST
by
nw_arizona_granny
(http://www.freerepublic.com/focus/chat/1990507/posts?page=7451 [Survival,food,garden,crafts,and more)
To: All
http://earthnotes.tripod.com/appsnack.htm
Chinese Meatballs #1
Serves 6 Tools: Deep-fry pan and wire basket
NOTE: Fritter batter must be made the day before.
Main Ingredients
Fritter Batter
1½ tsp salt
¼ tsp powdered mustard 1½ lb ground lean beef
2 tsp soy sauce
1 tbsp fresh parsley finely chopped
Batter Ingredients
2 eggs
1 tsp salt
1 tbsp sweet butter, melted 1-1/3 cups flour or rice flour
¼ tsp white pepper
¾ cup flat beer
FRITTER BATTER:
1. Separate eggs; place yolks in cup and whites in a large bowl; cover and reserve whites. Beat yolks with a fork
2. In mixing bowl combine flour, salt, pepper, butter and egg yolks; mix well
3. Gradually add beer to flour mixture
4. Allow batter to rest, covered and refrigerated overnight (at least 3 hours); just before using, beat egg whites until stiff (but not dry) and fold them into the batter.
MEATBALLS:
1. In mixing bowl combine all ingredients except batter. Mix well
2. Shape seasoned meat mixture into 18 balls
3. Coat balls with fritter batter; let dry on rack for 30 minutes
4. Fill deep, heavy kettle ½ full of peanut or vegetable oil; heat oil til it reaches 375ºF or, when you think the oil is hot enough, drop a 1-inch cube of bread into the oil and count slowly to 60; if the cube browns in this time then the oil will be around 365ºF
5. When oil is ready place batter-covered meatballs in a wire basket; deep-fry meatballs til they are golden brown
6. Serve immediately with Chinese mustard or sweet-and-sour sauce
Chinese Meatballs #2
Serves 4 to 6
Ingredients
½ lb ground beef
1 tsp soy sauce
white of 1 small egg
1 slice ginger ½ tsp salt
½ tsp sesame oil
2¼ cups brown stock
3 scallions finely chopped ½ tsp sugar
2 tsp cornstarch
2¼ cup water
1. Combine beef, salt, sugar, soy sauce, sesame oil, cornstarch, and egg white in a small mixing bowl; mix, stirring clockwise until soft; form mixture into bite sized meatballs
2. Place stock and water in a small kettle and heat to near boiling
3. Add the slice of ginger and meatballs
4. When meatballs float to the top of the broth they are done; add scallions and serve immediately
9,079
posted on
12/23/2008 11:14:32 AM PST
by
nw_arizona_granny
(http://www.freerepublic.com/focus/chat/1990507/posts?page=7451 [Survival,food,garden,crafts,and more)
To: All
http://earthnotes.tripod.com/hrbcookies.htm
Anise Hyssop & Almond Butter Cookies
Ingredients
1 cup sugar
¼ cup anise hyssop florets, removed from stem
1 extra large egg
12 tbsp unsalted butter in 12 pieces
½ tsp vanilla extract
2 cups flour
scant ½ tsp salt
3 oz almonds lightly toasted and coarsely chopped
Combine sugar and florets in a food processor and pulse till blended. Add egg and process about 1 minute. Add butter and vanilla and process about 1 minute. Mix flour and salt and add to processor; process about 20 seconds or till most of flour is incorporated. Add almonds and just mix - do not overprocess. Turn dough onto a lightly floured surace and gather into a ball. Divide into 3 parts and roll each into plastic wrap in a cylinder shape about 1½ to 2-inches in diameter. Chill for 1 hour or till firm. Preheat oven to 350°F. Slice dough less than ¼-inch thick. Place at least ½-inch apart on ungreased baking sheet. Bake about 12 minutes or till edges are golden brown.
on this pageAnise Hyssop Drop Cookies
Ingredients
1/3 cup anise hyssop florets, removed from stem
3 eggs
1 cup sugar
½ tsp vanilla
2 cups flour
1 tsp baking powder
½ tsp salt
Preheat oven to 325°F. Line 2 to 3 cookie sheets with aluminum foil (lightly greased). Chop florets fine. With electric mixer, beat eggs till thick and lemon-colored. Add sugar and flower petals and beat for 5 minutes, then add vanilla. Sift together flour, baking powder and salt and add to egg mixture. Continue beating for 5 minutes longer. Drop batter by teaspoonfuls onto lined cookie sheets, spacing well apart. Bake till they begin to color (about 12 to 15 minutes). Makes about 3 dozen.
on this pageCalendula Drop Cookies
Ingredients
6 to 8 fresh calendula blossoms
½ cup butter, room temp
½ cup sugar
grated rind of 2 oranges
2 tbsp orange juice concentrate at room temp
1 tsp vanilla
2 eggs, lightly beaten
2 cups flour
2½ tsp baking powder
¼ tsp salt
1 cup almond halves
Preheat oven to 350°F. Lightly grease 2 cookie sheets. Rinse flowers. Pull off petals and set aside. In a bowl, cream butter, sugar and orange rind till fluffy. Add orange juice concentrate and vanilla. Mix in eggs, stirring till blended. Sift together flour, baking powder and salt. Blend calendula petals and dry ingredients into creamed mixture. Drop dough by teaspoonfuls onto cookie sheet. Press an almond half on top of each.
on this pageCardamom Cookies
Ingredients
3¾ cups flour
2 cups butter
1½ cups confectioners sugar
1½ tsp almond extract
1 tsp ground cardamom
1/8 tsp salt
1 cup chopped walnuts
Measure all ingredients into a large bowl and knead till well blended. Shape into 1-inch balls and place 2 inches apart on cookie sheets. Bake 20 minutes at 350°F. Roll cookies in additional confectioners sugar if desired. Makes 6 dozen.
on this pageChocolate-Mint/Chip Cookies
Sift together:
2¼ cups flour
1 tsp baking soda
1 tsp salt
1 tbsp powdered chocolate mint (use a coffee mill to grind dried mint)
In a large bowl combine:
½ cup butter
½ cup shortening
¾ cup sugar
¾ cup firmly packed brown sugar
1 tsp vanilla
Beat butter, shortening, sugars and vanilla till creamy. Beat in 2 eggs. Add flour mixture and mix well. Then stir in:
2 cups (12 oz) semi-sweet chocolate bits
1 cup chopped walnuts (optional)
Drop by rounded teaspoonfuls onto greased cookie sheets. Bake at 375°F for 8 to 10 minutes.
Double Chocolate variation: Using the above recipe, combine 6 tbsp of cocoa powder and 2 tbsp of vegetable oil in a small container. Blend thoroughly. When the eggs are beaten in, add the cocoa mixture and beat in thoroughly. Continue on with the recipe.
on this pageClove Cookies
Ingredients
½ cup melted butter
1 cup sugar
1 tsp vanilla extract
1 egg
1 cup flour
1 tsp ground cloves
Stir sugar into melted butter till blended. Stir in Vanilla. Beat in egg till smooth. Stir flour and cloves together and add to butter mix till well blended. Drop by level tsp on cookie sheet. Bake 12 minutes at 350°F or till edges are golden and puffy and tops crinkle and collapse. Cool. Makes 4 dozen.
on this pageGingered Cranberry Chews
Ingredients
2 and 1/3 cups flour
2 tsp baking soda
½ tsp salt
1 tsp cinnamon
½ tsp ginger
1 cup sugar
¾ cup shortening
1 egg
¼ cup molasses
½ cup whole cranberry sauce
Combine all ingredients except cranberry sauce. Blend well and stir in cranberry sauce. Mix thoroughly. Chill at least 1 hour. Shape into balls using a rounded teaspoon. Coat with additional sugar. Bake on ungreased cookie sheets at 375°F for 12 to 15 minutes. Makes about 5 dozen.
on this pageHerb Cookies
Sift together:
2½ cups flour
1 tsp cream of tartar
½ tsp salt
Cream together:
1 cup butter
1½ cups sugar
To the creamed mixture add 2 eggs and beat well. Work in the flour mixture till well blended. Stir in 3 tbsp lemon thyme or other herb. Chill overnight. Roll into walnut sized balls. Bake on greased cookie sheet at 350°F for 10 minutes.
on this pageLemon Basil Snaps
Ingredients
2 cups flour
½ tsp baking soda
¼ tsp salt
¾ cup butter or margarine, room temp
¾ cup sugar
1 egg
1 tbsp grated lemon rind
1 tbsp lemon juice
1/3 cup chopped fresh lemon basil
Topping
1/3 cup finely chopped pistachio nuts
3 tbsp sugar
Combine topping ingredients and set aside. Sift together the flour, baking soda and salt and set aside. In a bowl, cream butter and sugar till light and fluffy. Beat in egg, mixing till combined. Add lemon rind, lemon juice and lemon basil. Stir in the dry ingredients, blending thoroughly. Wrap and chill the dough for 1 hour or till firm. Preheat oven to 350°F. Shape the dough into 1-inch balls. Roll the balls of dough into the topping mixture till well coated. Place 2 inches apart on ungreased baking sheets. Press cookies down with the palm of the hand to flatten them slightly. Bake 10 to 12 minutes or till golden. Transfer to racks to cool. Makes about 5 dozen.
on this pageLemon Thyme Cookies
Ingredients
1 cup soft butter
1½ cups sugar
2 eggs
2½ cups flour
1 tsp cream of tartar
½ tsp salt
3 tbsp dried lemon thyme
Sift together flour, cream of tartar and salt. Cream butter with sugar. Add eggs and mix well. Work in flour mixture till well blended. Stir in lemon thyme. Chill dough overnight. Roll into walnut-sized balls. Bake on greased cookie sheet about 10 minutes at 350°F.
on this pageMint Cookies
Ingredients
1 cup butter (or ½ each butter and shortening)
½ cup sugar
1 tbsp ground dried mint leaves
2 cups flour
¼ tsp salt
Cream butter and sugar. Add mint, flour and salt. Mix thoroughly. Chill dough. Form 1-inch balls and roll in sugar. Press with thumb. Bake at 350°F for 12 to 15 minutes. Makes 3 dozen.
on this pageSeed Cookies
Ingredients
1 cup softened butter
1½ cup sugar
2 eggs
3 cups flour
2 tsp baking powder
1 tsp salt
2 tsp vanilla extract
1 tsp grated lemon peel
1 to 2 tbsp herbs seeds such as: coriander, dill, caraway, anise, fennel, cumin
Sift together flour, baking powder and salt. Cream butter and sugar, then add eggs and mix well. Work in flour mixture and blend well. Add lemon peel, vanilla and seeds and blend well. Chill for at least 4 hours. Roll thin and cut into shapes with a cookie cutter. Bake on a greased cookie sheet about 10 minutes at 350°F.
©1999 by Ernestina Parziale, CH
9,080
posted on
12/23/2008 11:17:11 AM PST
by
nw_arizona_granny
(http://www.freerepublic.com/focus/chat/1990507/posts?page=7451 [Survival,food,garden,crafts,and more)
Navigation: use the links below to view more comments.
first previous 1-20 ... 9,041-9,060, 9,061-9,080, 9,081-9,100 ... 10,021-10,039 next last
Disclaimer:
Opinions posted on Free Republic are those of the individual
posters and do not necessarily represent the opinion of Free Republic or its
management. All materials posted herein are protected by copyright law and the
exemption for fair use of copyrighted works.
FreeRepublic.com is powered by software copyright 2000-2008 John Robinson