
Rainwater for Gardens: Why Plants Love Rainwater Best
by Jesse Savou
It might not come as a surprise that there’s no water plants love better than rainwater. Imagine your thirsty plants doused in droplets fallen fresh from the sky, their leaves expertly channeling the bounty down stalks and into the soil—right to the root zone where it is needed most.
Why is rainwater such a preferred water source? There is more than just one reason—in fact there are four:
Rainwater is 100% soft water.
Free of the salts, minerals, treatment chemicals, and pharmaceuticals that are found in municipal water, groundwater, and surface water, rainwater is pure hydration. Salts and chemicals build up in your soil over time and these residues are tough on plants. This effect is exaggerated in potted plants where the accumulation is more pronounced. Rainwater can help flush these chemicals away and refresh the health of your soils.
Rainwater is slightly acidic—naturally!
Green gardeners know that most organically grown plants prefer soil pH levels between 5.5 and 6.5. This is on the acidic side of the neutral pH 7, and by nature’s design, it is the exact pH range for rainwater. City water, on the other hand, is treated to be alkaline to protect metal pipes from corroding, and can have a pH level upwards of 8.5. Greywater (once-used household water from a laundry machine, shower, or bathroom sink) will start with the same pH as your tap water, but can have a pH as high as 10.5 once it gets to the garden depending on the types of soaps and detergents that are in it. Irrigate with rainwater to flush out your soil and help keep your soil pH in perfect balance ongoing!
Stored rainwater contains some organic matter.
If collected from your rooftop, rainwater contains traces of organic material. While the water is very clean and should run clear, it has been exposed to anything on your roof. We’re not talking about chunks (these get pre-filtered out on their way into properly-designed rain barrels)–we’re just talking about contact exposure to leaf litter, pollen, bird droppings and the like (which perhaps not surprisingly are great for your plants). A rain barrel hosts a beneficial biology to keep the water alive – literally. It’s like a light application of fertilizer every time you water.
Rain contains nitrates—an important macro-nutrient.
Rainwater contains nitrate – the most bio-available form of nitrogen. Nitrogen is one of the three key macro-nutrients that plants need to thrive – necessary for the development of lush foliage. Many forms of nitrogen are not actually able to be absorbed by plants. Nitrates, which are made up of nitrogen and oxygen, are formulated by nature for maximum uptake by your plants. Plants typically absorb most of their nitrates from the soil. And where do those nitrates come from? Rain!
On a personal note, before I discovered rainwater, I doubted I would ever be able to keep a house plant alive. I had somewhat better luck outdoors in the garden, but little did I know that the potted plants were really suffering from the salt, chemical, and mineral buildup of tap water, and the high alkalinity. Then I learned about watering with rainwater. Rainwater straight from my rain barrels into a watering can is what I use for my potted plants and nursery starts. A gravity fed drip line allows me to apply rainwater directly to my in-ground garden with no effort at all. And what a difference it makes. Suddenly I have a green thumb… but, Shhh, don’t tell! Rather, tell EVERYBODY! The secret is the water.
We’ve been having rain off and on for a few days. It’s hard to get outside to mow the lawn. Everything is pretty and green though!
The 4H center is having a Master Gardener show. Hoping to bring home a couple of hard to gets. A few years ago I purchased some Virginia bluebells to put under a tree, and they are growing very nicely. Would love to find a few more, but they are usually expensive.
I had a horrible dream last night that a sudden overnight frost had killed everything in my garden. Thank God that was only a bad dream. All good, except for herbs, where I suspect that the cat is doing his business. I should plant some catnip elsewhere to draw him away.
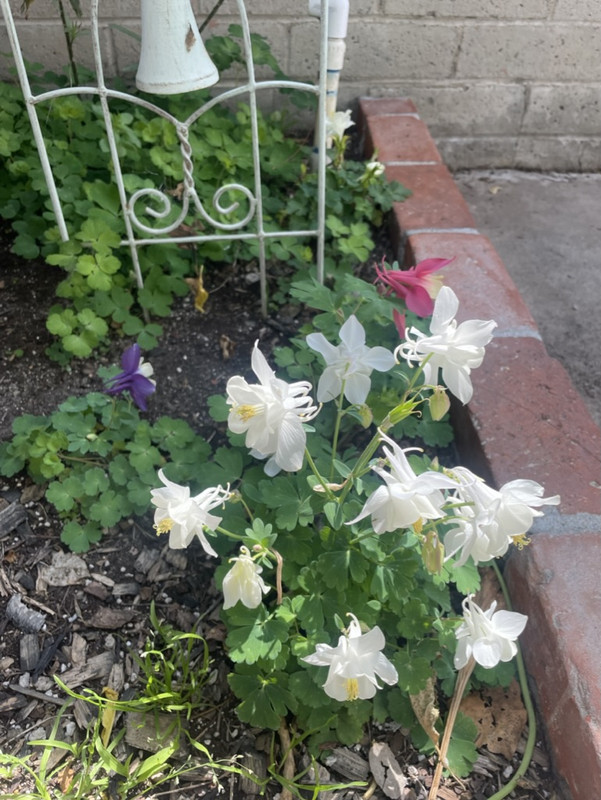
Our city water is so mineralized and chlorinated that it stunts plants' growth. A good rain washes all of this out of the soil. The columbine garden loved all the rain:
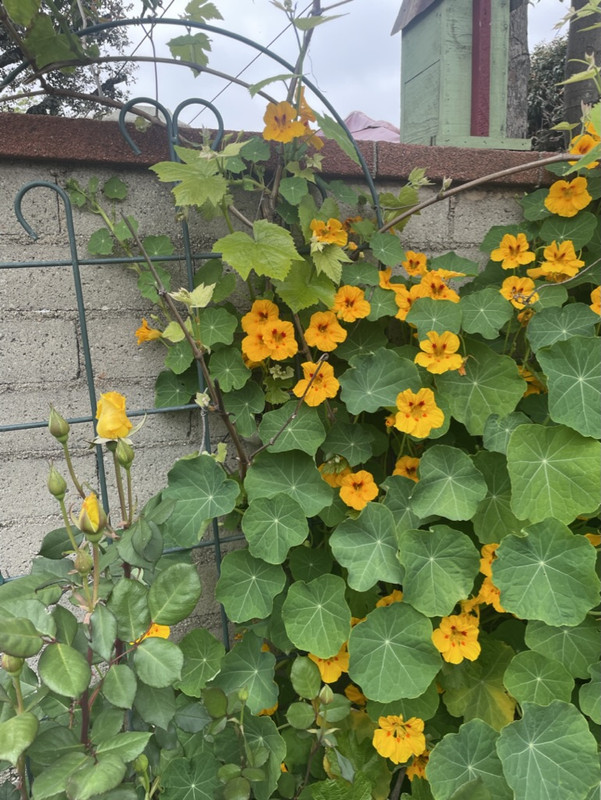
So did this volunteer patch of nasturtiums:
Geraniums loved the rain:

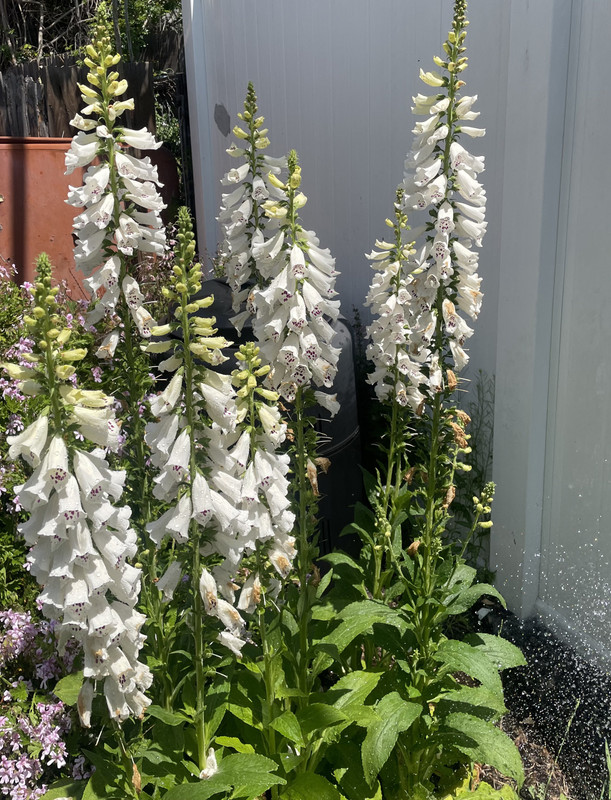
This patch of foxgloves went crazy:
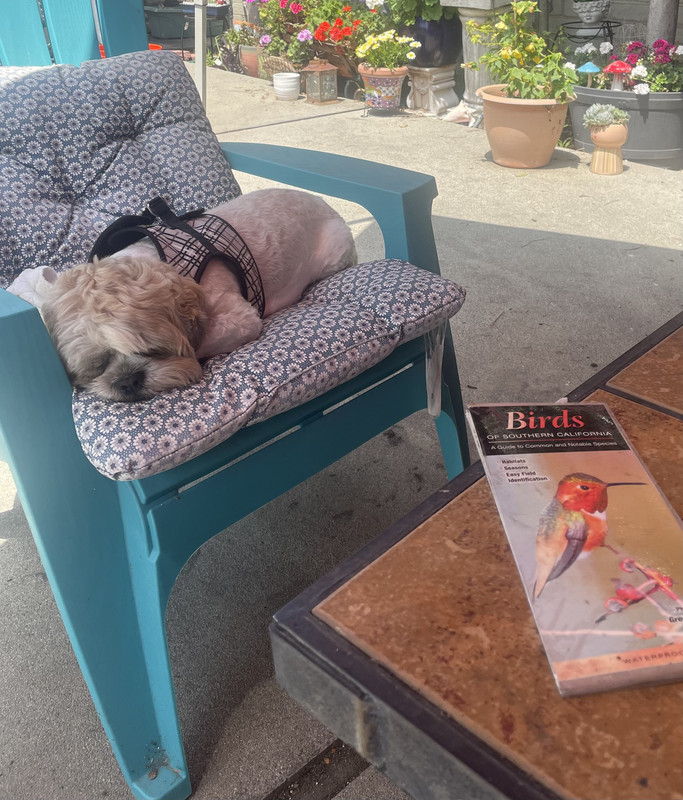
Helpers weren't fond of the rain, but were able to get outside for a few hours - in their favorite spots:


I have quite a few cordless power tools. I started out with Ryobi 18 volt but over time the Ni-Cad batteries died and once, when in need, went and got a Porter Cable 20 volt drill/sawzall/light lithium cordless kit. BUT I still have three cordless drills, two circular saws, jig saw, reciprocating saw, light & vacuum of the Ryobi(and 4 junk ni-cad batteries). They're compatible with the newer 18 volt lithium battery version so I just need a charger and lithium battery or two to have all those functional again. Been internet researching/shopping for those this morning and found Ryobi also has a portable tool storage system. Read one review that said just go with the Milwaukee PACKOUT System so I found myself on their website. Hundreds and hundreds of dollars could be spent.

All good wish list stuff but all I need is a $110 Ryobi 1/2" impact driver with battery and charger. Been wanting a cordless impact driver for a while plus it will give me all those other Ryobi tools back. A single battery will be fine as I do have the Porter Cable tools with two batteries.
I need other stuff like fence for a goat proof garden.
I'll probably get another $65 bottom/cart section of the Crafsman because I have too many modules to stack on the one and those bottom cart/boxes are big enough to hold several cordless tools and right now, all my Ryobi stuff is in two bags, one Ryobi and one Porter Cable that came with cordless tool kits and I can't even close the bags.
I must say though, one of these Ryobi 18 volt lithium 3 inch augers would be pretty sweet for planting.

Greetings from southern New Hampshire!
Yesterday was definitely a “ball buster”! I sanded the top of the footings for the raised bed in our Plata Sungrow 26’ greenhouse and added 3” of sand to the base this past week. Yesterday, Barb did a superb job of laying the three 48’ heating cables. The bed is 18’ by 2’.
Yesterday, I moved and placed about 72 8” by 8” by 16” cement blocks, with 36 capstones. Today, I am sifting and moving 5-gallon buckets of compost to file to the bottom of the capstones. Barb has wonderful plants started and is ready to populate the raised bed. I have plenty of other projects.
Our 14 new chickens (12 hens and 2 accidental roosters) have moved to the new chicken coop and run, separated from the two hens and one accidental rooster from last year. That rooster was named “Satchmo”, but after giving me two large dueling wounds on my right cheek (Don’t ask!) is now named “Satan”. He is going to be re-homed or I may kick his ass across the “Rainbow Bridge”!
Once the raised bed is done, I will need to get our garden watering system pressurized and repair it. Then there is the garden fence expansion.
Oh, Lord! Please wait, I have too much to do on Earth!
So the sun came out ... BRIGHT sun, no clouds, blue sky. “Nervous Nelly” here is afraid the newly planted tomatoes, squash & peppers are going to sunburn. They have mostly been hanging out on the porch day & night although I did put them in a shed for 3 nights when the temps dropped to 38-40 ish. They have been put out for morning sun, been in some fairly good breezes and I’ve set them out an hour or two in the afternoons.
Anyway, I have been out just now and covered them with my newly made garden “cloches” that I also turned into sun shades by adding some thin row cover.
I have always wanted some kind of ‘cage’ I could wrap with row cover for shades. Also, I had no idea what a “cloche” was until I ran across the term in an article the other day. While looking it up, I came across this great idea & I was off to the Dollar Store ....
DIY Dollar Tree Garden Cloche | Two Dollar Project
https://www.youtube.com/watch?v=NG69yS54BZ8
I bought 10 of the wire trash cans (wish they were bigger, but they’ll do). I cut out row cover that was enough to make a cylinder (seamed with duct tape) & gather at the top so I could tie it closed with a string. The tube just slides over the wire trash can, then I tie it on.
These are working beautifully - for the peppers that are staked (stakes a little higher than the plant), the cloche sun shade just sits on the stake. Breezes are ok - bigger winds would be problematic. Everything is now shaded ... will take them off when the sun is not so overhead and hot so they can get a little more direct sun this afternoon.
Note: I did not buy the grease screens - didn’t need knobs.
I’ve bene gradually getting the veggies in.
Been planting lots of onions (very popular with the family) some Brussel Sprouts, Romaine lettuce, carrots, potatoes, beans, dill, and started some herbs in trays.
My garlic is at least 8-9 “ tall already! I don’t ever recall seeing it that tall so soon. I also side dressed them with fertilizer this year, something I don’t always do. I am excited about seeing how the crop turns out.
Going to Tractor Supply next week to get a roll of 4 foot tall fence for around the front yard garden area and will do wood corner posts instead of t-posts so I can get it tight. Might stick a hot wire up top too. Not dealing with goats wrecking my mater plants again this year. Tractor Supply is almost up to where St Louis Compost is so I may as well grab a truck bed full of compost for the front yard garden.
Taking it easy today and will be windy tomorrow so no welding getting done on the high tunnel frame. I'm not in a hurry. As long as it goes up and gets closed in by Fall. If I'm out there welding them up on a hot windless day in July, that'll be fine. BTDT.
I've started way less plants than last year. I'm still learning/practicing and the seedlings are much better than last year so that's progress.
I started greens and lettuces but they're pretty tiny. Will get some baby salad greens at least. Started them late. I'm not going by JohhnysSeeds timeline anymore. Wouldn't apply to the tunnel anyway.
I think I'm doing beans this year. I've got several varieties of pole/string beans and didn't do any last year. Got some sweet corn and small watermelon too. Could do a three sisters planting.
Reverting back to a question I asked here weeks ago, I looked into coffee bean grinders to grind up chicken egg shells, per a FReeper’s suggestion. However, most under $50 or so are small. I’d like to grind up the eggshells a half gallon to gallon (loosely filled) at a time, maybe every month or two.
I also looked at grains’ grinders — there’s one on Amazon and eBay that looks pretty good for around $30, but, it looks to me like the grinding disks themselves are aluminum. That seems like it’d wear quickly.
Some people roll ‘em under a rolling pin. Seems a bit messy if doing many.
What about putting some in a large, well washed out laundry detergent bottle (take out the plastic insert under the cap), add ~ 1 pint medium large gravel (say, 1” to 2” pieces), shake well, and then “screen” out any large pieces of shell surviving, and the gravel pieces. ??? Has anyone tried that? Did it work?
Extreme hardening off.
Put my mater seedlings out yesterday afternoon and forgot about them so they were out all night. Oopsie. Don’t seem any worse for wear but it’s supposed to get pretty gusty today so I’ll have to bring them in soon. In fact I see the trees swaying so I’m doing it now.
Over the weekend I moved most of my brassicas from their cozy little starter cells in the greenhouse and stuck them in the dirt out in the cold cruel world. I've still got half a dozen or so in starter cells on the ground in the hoop house that need to be set out. I spent a bit of time setting up soaker hose on the sweet corn patch and along the cucumber fences. Also got an irrigation line run to the front where I planted the chestnut trees awhile back. I didn't go to the trouble of setting up dripline though. Just a mainline hung on the fence terminated with a stop valve and garden hose fitting. Dragging a bit of hose once a week is a lot less trouble than picking up/resetting dripline every time I need to mow the grass.
Two more weeks until it's safe to put things that are intolerant to cold outdoors. My tomato plants have all been moved from starter cells to gallon pots so they are ready when it's time. Eggplant and peppers are still in starter cells and will stay there until they move outdoors permanently.
Due to wet springtime soil conditions I've gone four years without planting my sunflower field, but it's going to happen this time. Pops and I mounted the moldboard plow on Mr. Clarence and turned the soil on Saturday. That wound up being a good move because yesterday was cold and windy. Getting the plowing done wouldn't have been any fun at all in those conditions.

Up until a few years ago, I had never seen a Baltimore Oriole for at least 30 years. Within a couple weeks of setting up an Oriole feeder, I had a couple coming to eat.
Flash forward, since Orioles migrate to South America for the winter, they return every spring. So, I have been setting up my Oriole feeder during the last week of April.
For the past five years, here has been their arrival dates:
June 19, 2016 (when I first set up the feeder)
May 2, 2018
May 2, 2019
May 2, 2020
May 3, 2022
And now today, May 1, 2023
I find that to be an incredible sense of timing in nature…………..God is wonderful!
Report from Hawaii:
No garden until fall.
House/backyard has Lime and Banana trees..
Limes are ripe and tasty - Bananas are going to be challenge ...
Getting my surf/sea legs under me...
Aloha!
I have a pretty small backyard less than 1600 sq. ft. and much of it is low to no direct sun, and the best sunny areas have very bad soil; clay and shallow roots of now dead trees that will take years to go away. I live in southeast michigan.
I have yet to begin any rain barrel irrigation, but have planned on it for years. We had a pretty good tomato harvest last year two celebrity plants, half day Michigan sunshine but I'm hoping to do better this year.
I'm thrilled with the concept of totally automated rain barrel irrigation in my backyard that seems to suffer drought at least once or twice a summer.
If anyone here is utilizing SIP, I'd love to compare notes. I'm designing use of humidifier float valves perhaps both in the planter and the rain barrel to ensure foolproof hydration regardless of weather trend.
My concern and question involves oxygen; Albopepper's design uses an open air fill tube that he apparently filled till overflow everyday or whatever his time period was/is, my design so far has no entry for oxygen so far and that is my concern.