

Sounds like a winner to me.
HMB/Bizarre PING....
If you want on or off this list, FReepmail me!
FYI: This has fast outgrown it's original "charter" and become a home for the truly bizarre. An alternative saying/phrasiology is being sought (and suggestions are very welcome!). Also, like it's "cousin list" the B/C list, it has become a high-volume list.
I'm leaning toward "Just damn," on the suggestion of quite a few folks. I won't make a decision until Sunday. (And thanks to all of you for sending your suggestions!)
Hmm, wonder if I could persuade some of my students to build one as a project?
Of course I could. Let me rephrase that:
Hmm, wonder if I could persuade some of my students to build one as a project and still keep my job?
Sounds like a winner to me.
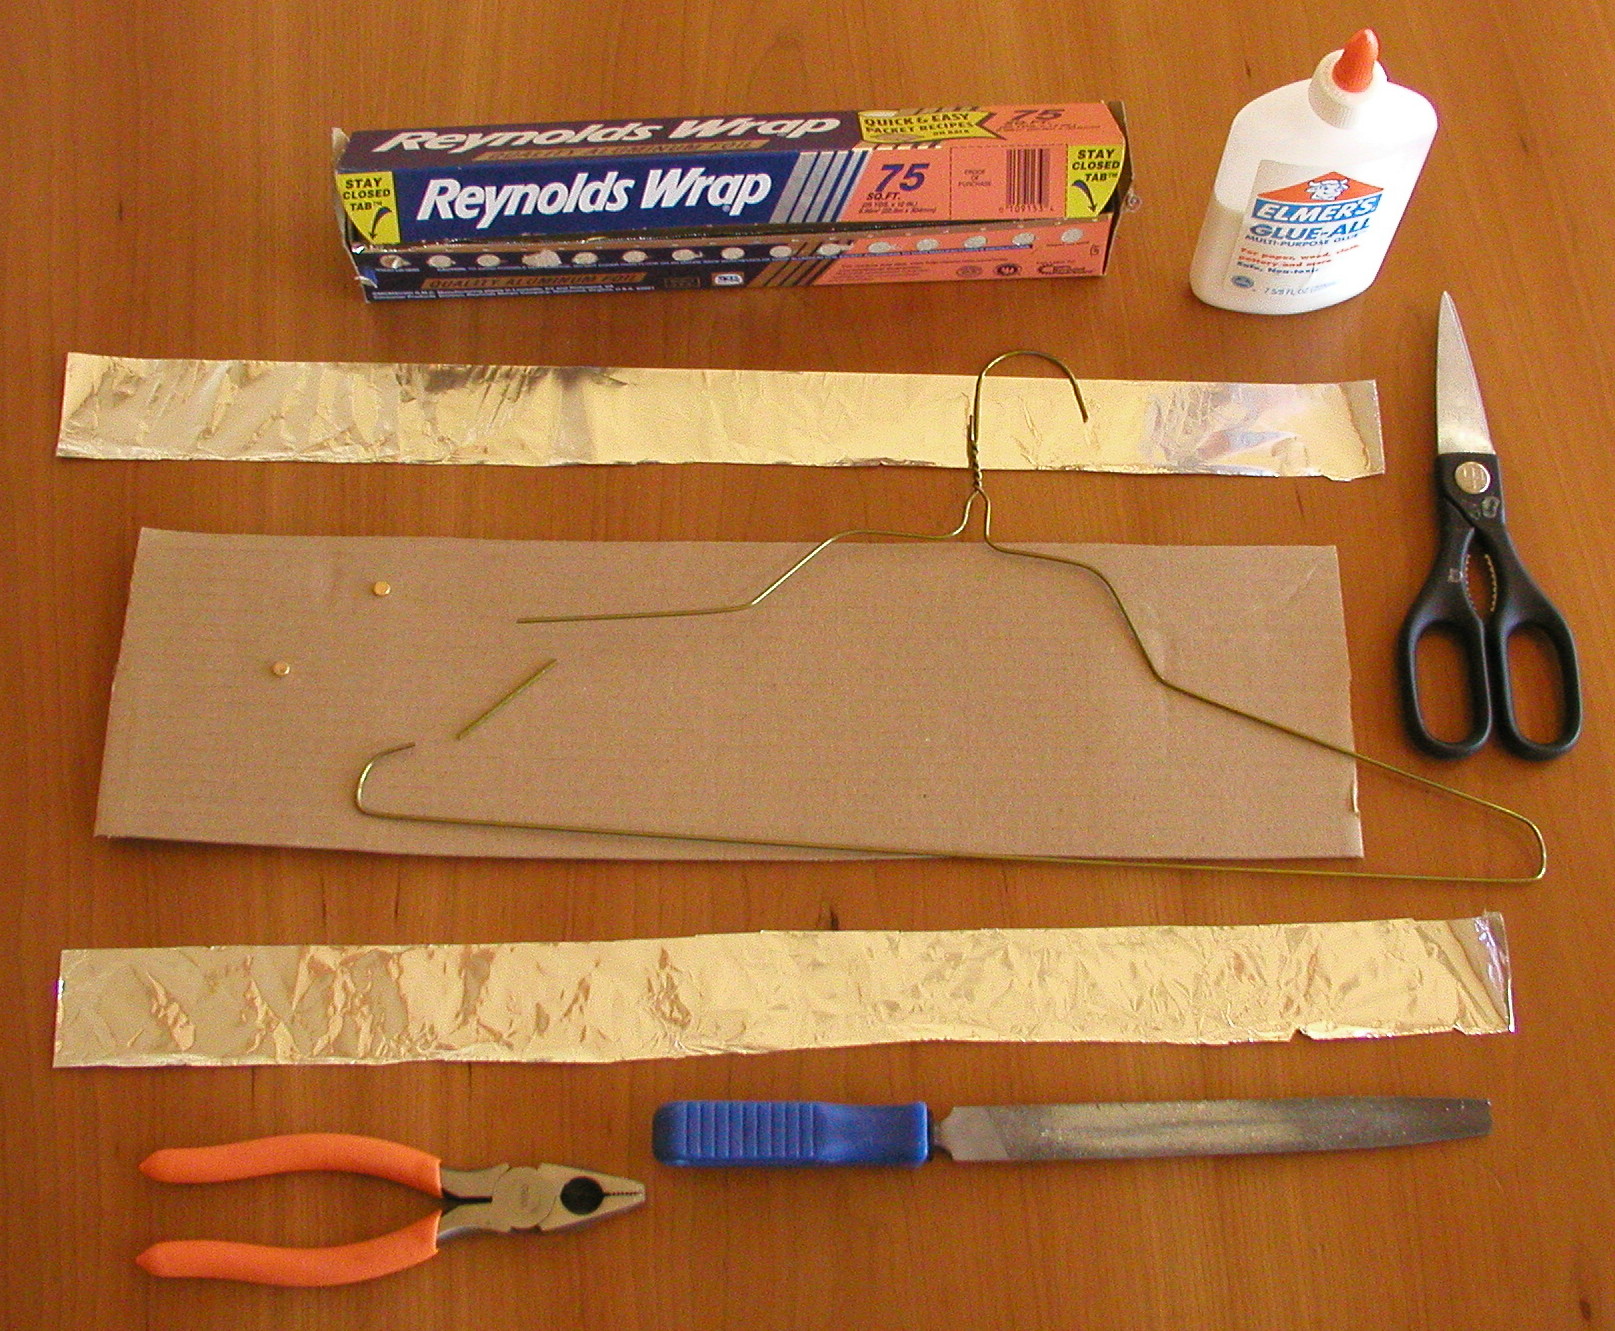
A railgun is a device for accelerating an object by running electric current through it along a pair of rails. When large amounts of power are used, the railgun becomes a potent weapon. But the principles can be demonstrated safely by using a smaller amount of power, in our case, from a 9 volt battery.
When a small amount of power is used, the rails can be re-used many times. If larger amounts of power are used, the railgun becomes a one-shot device, as the rails are destroyed in the process of shooting the gun, due to arcing and flexing of the rails.
There are several types of rail gun, each with a different method of accelerating the object. This version is called a linear homopolar motor.

Click on image for an animated picture
Click on image for a larger picture
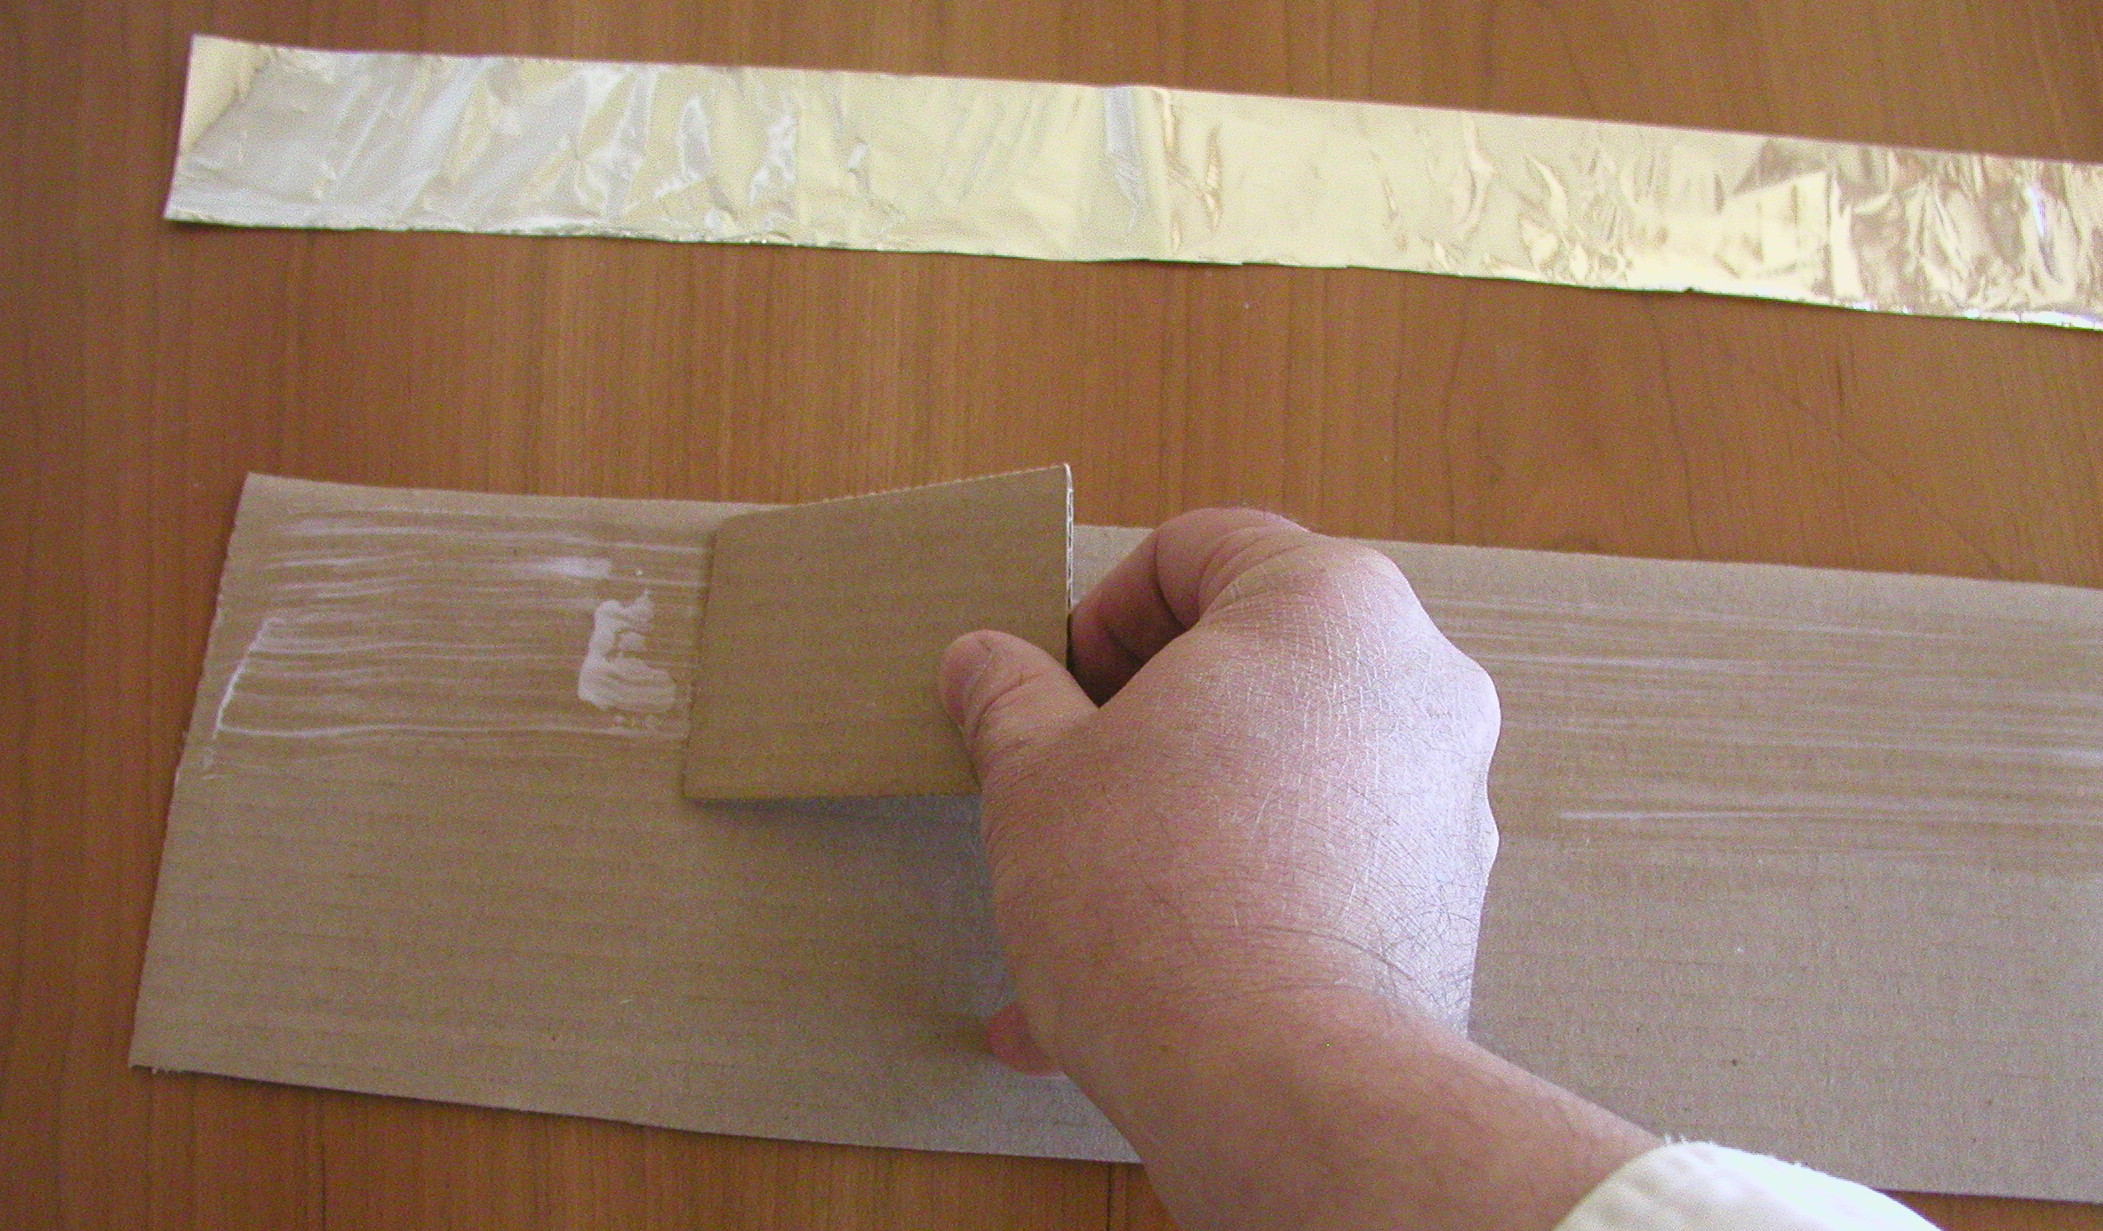
We start by spreading a thin layer of glue on the base, to hold down the foil strips.
Click on image for a larger picture
The foil strips are then placed on the base, about a half inch apart, and smoothed down with fingers to remove wrinkles. The extra 2 inches is left hanging over one side, to make it easy to clip on the leads for the battery.
Click on image for a larger picture
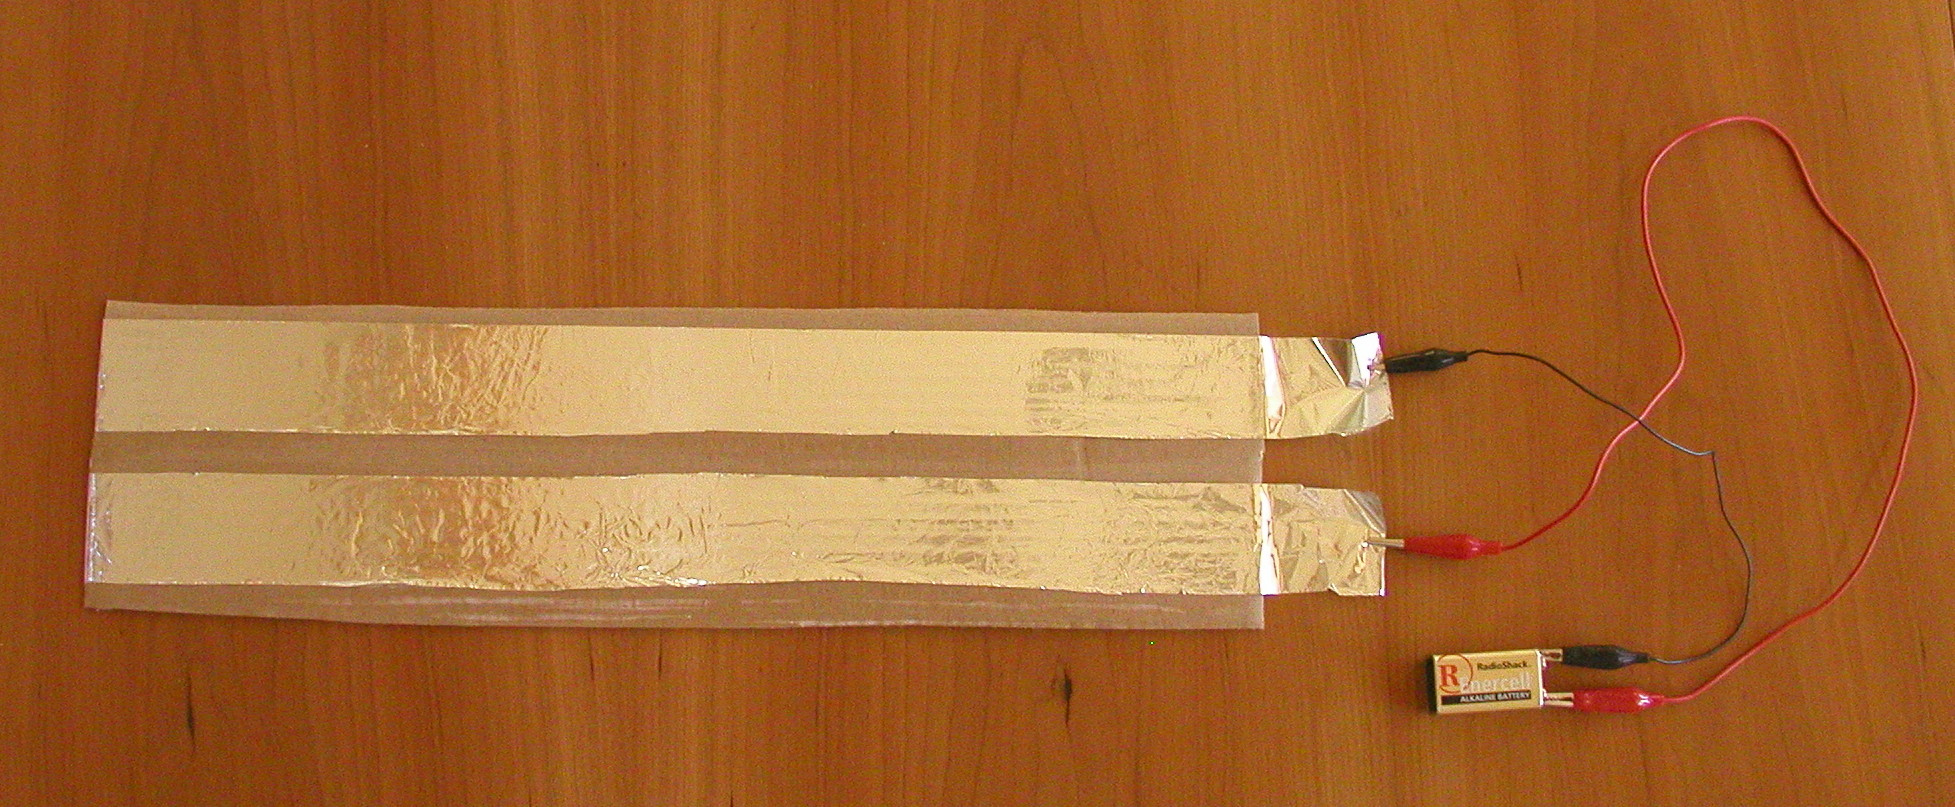
Next we attach the battery with the clip leads. We won't worry about battery polarity at this time -- if the gun shoots the wrong way, we will reverse the battery.
Click on image for a larger picture
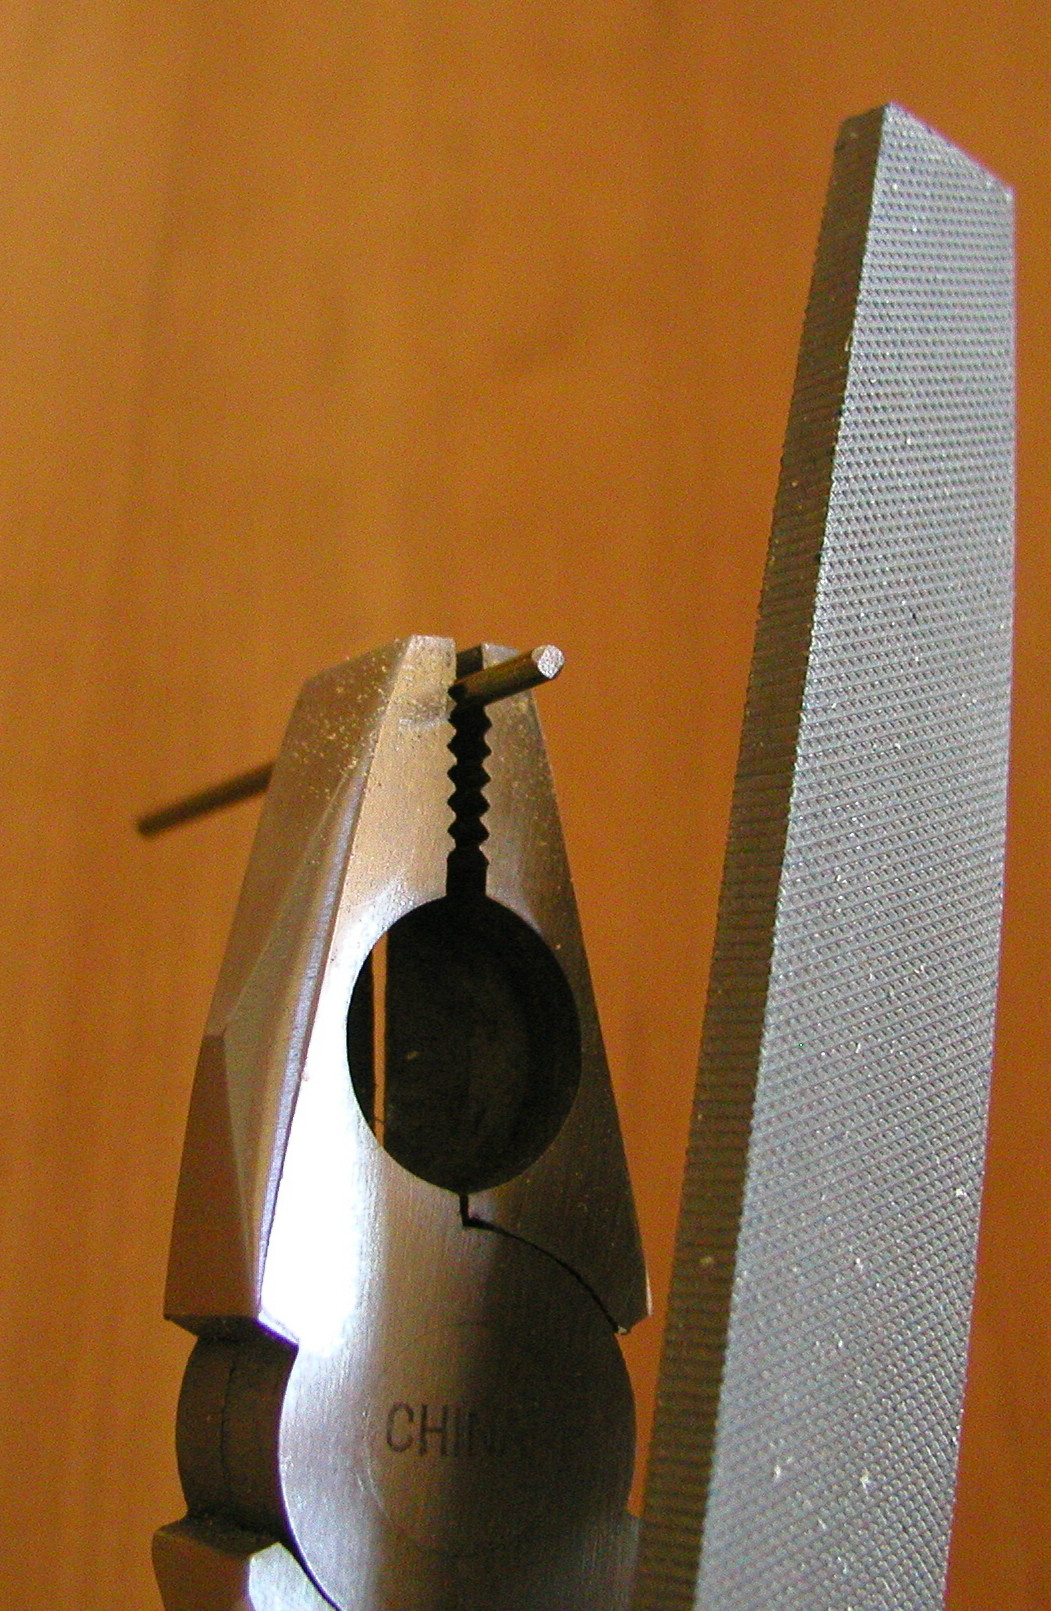
The nest step is to file the ends of the coathanger wire flat. This will allow the magnets to stick flat to the ends of the wire axle. If the filing is done carefully to make the flat ends perpendicular to the wire, then there will be less wobbling as the magnets travel down the rails.
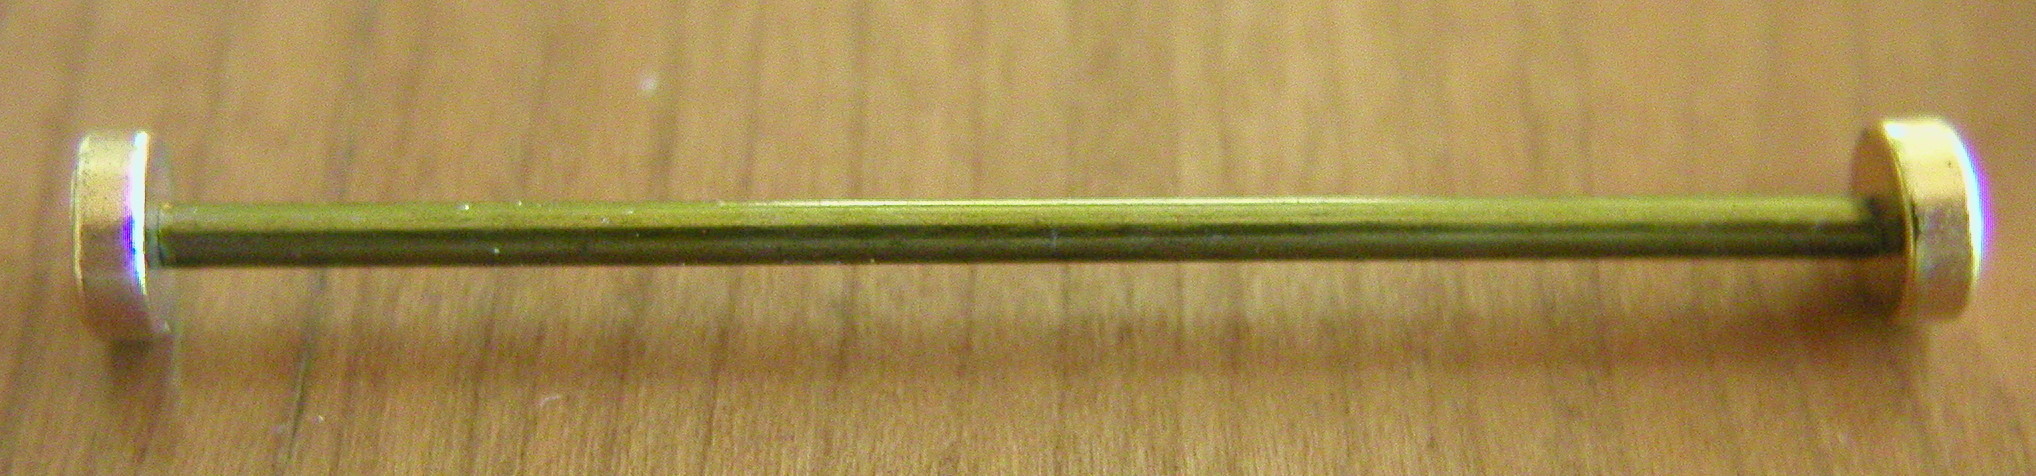
Click on image for a larger picture
Now the magnets are placed on either end of the wire axle. The magnets should have their poles facing in opposite directions. The magnets repel one another when aligned this way, but will still stick firmly to the steel axle. No glue is necessary, as the magnets are very strong.
To fire the railgun, just drop the wheels on the rails. They will start to accelerate immediately. If they don't move at all, the magnets are probably not pointing the same way. Lift the wheels, and flip one magnet, and try again. If it still doesn't work, check the battery and the connections.
If the wheels move in the wrong direction, you can either start them at the other end, or reverse the battery.
Click on the photo below to see the railgun in action.
Click on image for an animated picture