Get the commercial stuff not the stuff you find at the grocery store. Get the fine grade. You can get it at the local hardware store.
Posted on 08/15/2009 12:48:35 PM PDT by djf
Ok. I bought an end table at a garage sale the other day for a couple bucks. It needs some TLC, and but I figured I could use it as is now and do some minor touch-up at some later date.
Just out of curiosity, I took my penknife and scraped of some of the old finish.... man oh man is this thing beautiful!
Either cherry wood itself or some kind of eastern hardwood cherry stained, there are no deep gouges in it, nothing wrong at all except the old shellac (which comes off in big flakes at times!).
But! There are some fairly intricate places where the wood has been carved in to these long lines of like bumps or buttons, and I'm a bit unsure how to handle them.
I've done a fair amount of woodwork before, and my usual procedure is to scrape off the old finish, sand with a 200 grit or so, then sand with 0000 steel wool. Usually I use Minwax polycrylic finish, which I think would do an excellent job here, but I gotta get the old stuff off.
Help!!
I did have one little trick on refinishing items that I didn't want to destroy the original color, didn't want to take forever sanding, or just wanted to touch up the look. Usually on old pieces that weren't antique, but were intesting but needed some help. I called this my recipe.
Equal parts of turpentine, boiled linseed oil and vinegar. Spread it out on the surface and scrub with extrememly fine steel wool. Wipe dry with cloth. Repeat if necessary. Buff when cleaned and smoothed to your satisfaction. You're done.
Be sure to use the right kind of sand... Although if your working with glass and want a pattern, you tape off what you want to stay clear, and lightly sandblast the other area's...practice with scrap glass to find out how much to use....With a sand blaster you will get the sand into every part of your face...I used my son's welding mask and did it back by the barn...even safety glasses are not sufficient....good luck
Your receipe is good, I use to use it than forgot if it was pure linseed oil or boiled. Thats when I tried liquid gold and its works great. Comes in spray or pour on...but your receipe works good too. Easy to apply, put in glass jar with lid so you can shake it up to mix well before using..
If neither acetone nor isopropanol are touching it, and if the vintage of the piece is late 1940’s / early 1950’s (I concur with 4yearlurker up-thread) then you won’t be dealing with shellac. You probably are also not dealing with a printed grain. It is likely a thin hardwood laminate onto plywood, probably finished off with a coat of varnish.
Still, you have the original finish and the patina, both of which you should try to preserve, else you won’t be able to match it when you re-finish.
I’d stay away from paint stripper unless you really do want a brand-new looking piece.
If the varnish is easily chipping off, I’d suggest a very, very, very fine sandpaper — wet&dry — in an orbital sander. Use plenty water and sand away. Keep the slurry on the piece, spread it around. When you figure you’ve got the varnish off, wipe away the slurry and have a good look-see.
The slurry will act as a lubricant, helping you keep from cutting too deep. As it is wet it will also raise the grain, which will in turn get cut down by the wet&dry. You should end up with a very smooth, very even-colored finish.
Do the carved bits by hand, if you must, or with a Dremel, or just leave them.
Once done, finish with a nice satin polyurethane or maybe even Danish Oil.
Great advice, its been so long since I stripped any wood, after stripping I would use a stain as close to the wood color that I could find...after it dries I then use Liquid Gold. don't use any paste wax, it builds up and is nasty. like you I hate filler, you can never get it to match.
> If it needs “filling”, I cannot recommend a filler and hate filled wood...
If you need a filler, thoroughly clean your dust-catcher on your orbital sander and sand the surface until you have it nice and smooth. Then, empty the dust-catcher into a jar, add enough varnish to mix it into a thick paste, then enough thinner to dilute it into a consistency you can work with as a filler.
By making your own filler in this manner, your filler will be an exact averaged-out color match. Use a putty knife to apply.
When it’s all dry, sand again with very fine wet&dry (wet or dry) then finish as per normal.
You want to be careful from a few viewpoints. First, on a lot of old pieces the “grain” is actually printed on — yup, printed. If you aren’t careful you can remove the printed grain only to discover that what’s underneath isn’t nearly so beautiful.
Ouchy, I did that once and ruined a old piece...:O( a sad lesson learned..
Great Idea thanks
(grin!) I learned that trick from my grand-daddy, who used to meticulously sweep up his hand-sanded fine sawdust for wood-filler. He’d use either varnish or carpenter glue to make the paste — both work equally well.
Technology like these new rotary sanders make the job so easy it’s a sin not to make our own wood-filler.
The dremel is good for repairing a tooth that falls out of a denture...then Crazy glue, but thats a whole other story..:O)
Get the commercial stuff not the stuff you find at the grocery store. Get the fine grade. You can get it at the local hardware store.
Man needs advice on strippers.
I am so proud of Freepers, as a group you all must be the smartest group around...:O)
Look at the style and the wood. If anyone thinks this is valuable, take it to an antique shop and see if they will give $50 for it. It not, well.......
Sure, people find good stuff in odd places but this doesn’t look like one.
As the old saying goes “One man’s trash is another man’s treasure.” I have heard the same thing said about X wives also...
Dozens of x wives will be at your home soon. I know you’ll treasure them.
Disclaimer: Not an expert. And I've been told I can be . . . uh . . . opinionated. LOL.
I have refinished a lot of furniture on the past 35 years (and a whole houseful of 1926 doors).
You don't want to use paint stripper. Paint stripper is for PAINT. There is no paint on this end table. It has a clear finish. You want to use a "refinisher" to DISSOLVE the finish away. If it is shellac or lacquer, then alcohol or lacquer thinner will remove them. If not, then go to "Formby's Refinisher" or a generic equivalent. Brush on the finish remover and let it work a while, then use tons of rags or cheap paper towels to wipe it off. Repeat until the endtable looks very "clean" with no smudges or sticky areas.
The REALLY BAD NEWS . . .this stuff isn't cheap, and you need to do an incredibly thorough job because you're about to seal whatever you leave behind under the new finish . . . and you'll use a lot more than you plan to . . . but dissolving the old finish is the hardest part. You'll be home free after that.
You DON'T want to scrape the wood. That just damages the wood. The wood on your end table appears to be in perfect condition. It's the finish on top that's bad and needs to removed. So leave the wood alone and just remove the finish.
To clarify, it is impossible to completely remove a clear finish from wood. When first applied, shellac soaked into the pores of the wood and the shellac down in the pores is effectively permanently there. You could go through superhuman efforts to get the shellac out of the pores, but then you'd have no patina left and the wood would have raised grain.
So the object is to dissolve as much of the old finish as you can. And for crevices, you don't use a scrapper, you use old toothbrushes, fingernail brushes, and an indispensable new addition to our toolbox, "synthetic steel wool".
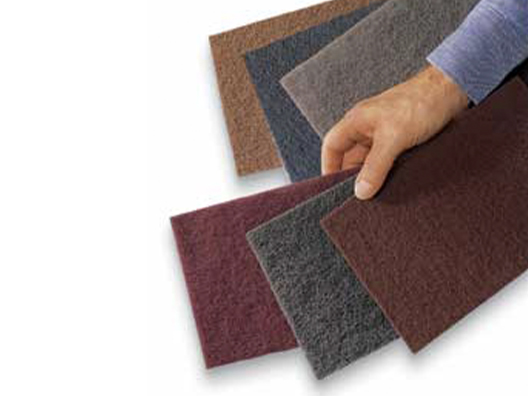
Synthetic steel wool is what you probably have in the kitchen and refer to it as "that green scrubby pad." Chemicals don't eat it away. And it doesn't leave 10,000 tiny bits of steel wool on your work. Woodworking catalogs have it in different grades (just like steel wool), but the green stuff from the grocery store will do. I personally buy a big bundle at a woodworking show I attend annualy and use it for EVERYTHING under the sun (the kitchen, cleaning bathrooms, cutting it into a circle and sticking it to my random orbital sander).
A dental pick or equivalent is fine for intricate places if you have no other choice. Your goal is to AVOID RAISING THE GRAIN OF THE WOOD.
Unfortunately, that is sometimes easier said than done. But if you dissolve the finish, instead of scraping/stripping/picking it off, your sanding should be either zero or 2 minutes of work hitting it very lightly with 400 grit paper or with the synthetic steel wool. How do you determine if something needs to be sanded? You run your hands over it and if it feels smooth, then it doesn't need sanding.
I have NOTHING AGAINST SANDING. I sand bare wood all the time in preparation for a finish. But this wood has already been sanded before it was finished. Unless you raise the grain, it will need almost zero sanding.
Now, a piece of bad news. Wood that has the finish removed doesn't accept stain very well. Why? Because the pores of the wood still have old finish clogging them. Hopefully, you won't need to stain . . . you'll love the color as is.
If you do need a bit of stain (and you probably will to blend away knicks and deeper scratches, I'd first wipe an oil-based stain on, let it sit a couple of minutes, and wipe it off. If it looks blotchy, then the only good way to apply stain is by a sprayer so it "lays evenly on top" of the wood. Followed by spraying a finish so that you don't move the stain around by brushing it. Which means you need a pretty good sprayer for that.
Finishes? Fortunately, they are 500% better than they were 100 years ago. As a teenager, I refinished tons of furniture for my Mom and those finishes look as good today as they did 30 years ago.
Shellac is not a finish that is widely utilized any more because it's not very durable. As you noted, it become brittle and flakes off. No finish expert here, but I think it's a UV deterioration problem. Shellac is very hard to find. I think you have to buy shellac flakes and dissolve them yourself in alcohol. Not convenient to recreate another finish that will soon fail.
Why was shellac so popular? Because it's highly colored (amber/orange) and imparted a warmth to wood, even to cold looking woods like Walnut.
So what to use? Sprayed lacquer is a beautiful finish (even spraying it from aerosol cans looks amazingly good). BUT it's that finish that gets white rings under wet glasses, so probably not the best for an end table.
Polyurethane is probably the ugliest finish I've ever seen. If you do decide to use it, use the "wipeable" stuff (where you put it on with a rag), rather than the brushed stuff. Brushing it is like brushing honey on a piece. Sticky . . .gummy . . . every brush mark shows . . . and it fills with dust while it dries.
My personal preference are the oil based finishes, particularly TUNG OIL.
The good part about Tung Oil . . . easy to apply. Just dampen a lint free rag (cut up cotton t-shirt) and lightly wipe the entire surface.
The bad part about Tung Oil . . . you have to put on a lot of applications. Wipe it on very thinly . . . wait a day . . . the wood will have unevenly soaked up the tung oil (the more porous sections with end grain and oblique grain will have soaked it up like a sponge). That's a good thing. You're trying to get an even substrate for your later applications.
Reapply. Wait a day. Reapply . . . Wait a day . . . Reapply . . . continue for as long as it takes until you've built up an even, beautiful finish with no brush marks or streaks. No sanding between coats required. If you get anything in it (lint, gnats, DOG HAIR . . . ), just hit it with your synthetic steel wool and a clean rag, and keep going.
The finish will feel slightly oily, but over the next year will greatly harden. And then it won't feel oily.
Don't wax over your tung oil, use lemon oil on your dust rag, and it will look better than the day you finished it.
If 10 years down the road, you have a scratch or dull spot, just wipe on a new coat of tung oil over the whole thing. Done.
Good luck with your project. Be sure to post an "after" photo.
OK!!!
After getting more of the finish off, my conclusions are these:
It is veneer mahogany.
At some point in the past, it was stripped. Whoever did it user a water based cherry stain on some parts of it, but not all.
It is worth it for me to redo it, I think I can make it come out quite nice. It’s very well constructed, and much better than the cheap soft pine crap you get at Ikea or whatever.
But it will never be a Louis XIV piece! That’s OK! Neither will I!
C’est la vie!
Disclaimer: Opinions posted on Free Republic are those of the individual posters and do not necessarily represent the opinion of Free Republic or its management. All materials posted herein are protected by copyright law and the exemption for fair use of copyrighted works.