Posted on 02/09/2009 12:36:11 AM PST by nw_arizona_granny
http://coveredbaptists.proboards.com/index.cgi?board=animals&action=display&thread=2723
Make a lamp using Olive Oil
« Thread Started on Jul 8, 2009, 7:13am »
I found this article via a line to Mother Earth News, (I do NOT endorse the Mother Earth News at all) but the directions are helpful!
Making your lamp is relatively easy, and most likely you will have many of the materials on hand already. Here’s what you’ll need:
• A wide-mouthed glass jar (a quart-size wide-mouthed canning jar works really well)
• A short length of flexible steel wire (1 1/2 or 2 times the height of the jar)
• A wick
• Olive oil
Putting Together the Lamp
1. Form one end of the steel wire into a long hook, about the same height as the jar. This hook holds the wire on the jar and doubles as a handle to pull the wick up for lighting. (See photos in the Image Gallery.)
2. Take the other end of the wire and wrap it into a coil, creating a wick stand about an inch or two tall that sits on the bottom of the jar.
3. Pinch the top of the metal coil onto about 2 inches in length of wick so that about a quarter inch or less of the wick is sticking up above the wire coil. Any longer and the wick will smoke. The other end of the wick will be soaking in the olive oil.
4. Add enough olive oil to your jar so that the level is just under where the wick is pinched by the wire. Any higher and you risk putting out the lamp with the oil.
How the Lamp Works
The olive oil is drawn up the wick where it vaporizes and gets burned by the flame. A few ounces of oil will burn for several hours, so if you are concerned about the cost, it is much cheaper than most candles. If you can find lampante oil (olive oil not suitable for eating, but for burning), you can save money by buying that instead of culinary olive oil.
Want to get fancy with your olive oil lamp? You can infuse your olive oil with herbs, spices or essential oils for a more scented experience.
Notes on Materials
One of the benefits of using a canning jar is that, when the oil lamp is not in use, you can put a canning lid on top for storage. A wide-mouthed pint jar will also work well, you just need to adjust the size of the wick holder.
For your wick, you can use 100 percent cotton string or twine and salt it to ensure that it burns long. To salt your wick, take your cotton twine, put it in a bowl with a little water and then cover with table salt. Squeeze it dry and let it dry overnight, or until it is no longer damp.
If you need or want your lamp to emit more light, try using a braided, flat wick (a half inch or narrower), adjusting the way the wire supports this kind of wick by crimping it to accommodate the extra girth. You can buy flat wicks from stores that carry supplies for oil lamps (such as Lehman’s). Or, you can cut up an old 100 percent cotton tea towel into strips and use that instead.
How about adding links to the previous 2 threads to the message body? <<<
I will if I don’t forget, for starting threads is stressful for me.
Good idea, no reason that it can’t be on page one more than once.
http://fcs.tamu.edu/health/family_health/insect_repellent.php
Insect Repellent
Picking the right insect repellent could protect your health! Mosquitos, biting flies, and ticks can be annoying and sometimes pose a serious risk to public health (as seen with West Nile Virus and Lyme disease).
Forms and Concentrations:
* Aerosol and pump-spray products are intended for skin applications as well as for treating clothing.
* Liquid, cream, lotion, spray, and stick products enable direct skin applications.
* Products with a low concentration of active ingredient may be appropriate for situations where exposure to insects is minimal.
* Higher concentrations of active ingredient may be useful in highly infested areas or with insect species which are more difficult to repel.
* Repellents containing a higher concentration of active ingredient (such as DEET) provide longer-lasting protection.
Use the Following Precautions When Using Insect Repellent:
Check the container to ensure that the product bears an EPA-approved label and registration number. Never use a product that has not been approved by the EPA!
Read the entire label before using an insect repellent. Even if you have used it before, read the label again—don’t trust your memory.
Follow the directions carefully, use only the amount directed, at the time under the conditions specified, and for the purpose listed.
Store insect repellent away from children’s reach, in a locked utility cabinet or garden shed.
Using Insect Repellents Safely:
* Read and follow all directions and precautions on the product label.
* Do not apply over cuts, wounds, or irritated skin.
* Do not apply to hands or near eyes and mouth of young children.
* Do not allow young children to apply this product, and do not apply to children’s hands. When using on children, apply to your own hands and then put it on the child.
* Do not spray in closed areas. Avoid breathing a repellent spray, and do not use near food.
* Use just enough repellent to cover exposed skin and/or clothing.
* Do not use under clothing.
* Avoid over-application of the product.
* After returning indoors, wash treated skin with soap and water.
* Wash treated clothing before wearing it again.
* Wash hands after application.
Consumer Reports Rankings
In the table below, “Mosquito” indicates the minimum and maximum hours a product kept two Aedes mosquito species from biting testers; “Tick” indicates minimum and maximum times a product kept deer ticks from moving from untreated skin onto treated skin.
Product Type Cost per use Mosquito Tick Comments
Amway Hour Guard 12 Cream, 33% DEET $2.08 12–13 hours 9–11 hours Now sold as 3M Ultrathon
Avon Skin-So-Soft Bug Guard Pump spray, .1% citronella $0.67 n/a Not labeled for ticks
Avon Skin-So-Soft Guard Plus IR 3535 with Sunblock Lotion, 7.5 IR 3535 $1.00 1–3 hours 3 hours Includes SPF 30 Sunscreen
Ben’s Backyard Formula Lotion, 25% DEET $0.75 5–7 hours 5–7 hours Reformulated (20% deet); tested version may still be available
Bite Blocker Light Country Scent Lotion, 2% soybean oil $0.46 2–4 hours Not labeled for ticks Renamed Blocker
BugOut Aerosol, 15% DEET $0.11 3–7 hours 1–4 hours
Cutter Skinsations Pump spray, 7% DEET $0.22 1–3 hours 2–4 hours
Cutter Unscented Aerosol, 10% DEET $0.19 2–5 hours 1–7 hours
Muskol Ultra 6 Hours Aerosol, 40% DEET $0.24 7 hours 3 hours
Natrapel Pump spray, 10% citranella $0.27 1–2 hours Not labeled for ticks Reformulated (with aloe); tested version may still be available
Off! Deep Woods for Sportsmen Pump spray, 100% DEET $1.77 9–13 hours 3–8 hours
Off! Skintastic with Sunscreen Lotion, 10% DEET $0.67 3–4 hours Not labeled for ticks Includes SPF 30 sunscreen
Sawyer Controlled Release DEET Formula Lotion, 20% DEET $0.36 4–8 hours Not labeled for ticks
DEET
Most repellents rely on some percentage of N, N-diethyl-metatoluamide, called DEET, a chemical developed more than 50 years ago by the U.S. Army and the Department of Agriculture. DEET doesn’t kill bugs, but its vapors discourage them from landing or climbing on you. It’s generally acknowledged to be the most effective mosquito repellent there is. Consumer Reports found that a product’s hours of effectiveness generally increase with its percentage of DEET. (http://www.epa.gov/pesticides/factsheets/chemicals/deet.htm)
DEET is available in many different concentrations ranging from 4 percent to 100 percent. It is the active ingredient in most insect repellents. Approximately 230 products containing DEET are currently registered with the United States Environmental Protection Agency (EPA). Most insect repellents that are available in stores are labeled with the chemical name for DEET. Choose a repellent that offers appropriate protection for the amount of time you will be outdoors. A higher percentage of DEET should be used if you will be outdoors for several hours, while a lower percentage of DEET can be used if time outdoors will be limited.
Are there health concerns using DEET? The EPA states “as long as consumers follow label directions and take proper precautions, insect repellents containing DEET do not present a health concern.” The EPA is no longer allowing child safety claims on product labels. These claims currently appear on certain products containing a DEET concentration of 15% or less. The scientific data on DEET do not support product label claims of child safety based on the percentage of active ingredient. (http://www.epa.gov/pesticides/factsheets/chemicals/deet.htm)
The Centers for Disease Control and Prevention (CDC) recommend adults use an insect repellent that contains less than 35% DEET, while children should use a product that contains no more than 10% DEET. Repellents with DEET should be used sparingly on children 2 through 6 years of age and not at all on infants younger than 2 years of age. (http://www.cdc.gov/travel/bugs.htm)
NON DEET
Although DEET is generally considered safe when used according to directions, some people prefer not to use it. For that reason, Consumer Reports tested several products that use plant oils instead. It is important to remember that essential oils, while derived from plants that grow naturally, are chemicals too. Some are potentially hazardous if ingested, applied over wounds, cuts, irritated skin, or mucus membranes such as the eyes. (http://www.consumerreports.org)
Some non-DEET repellent products which are intended to be applied directly to skin, also provide some protection from mosquito bites. However, studies have suggested that other products do not offer the same level of protection, or that protection does not last as long as products containing DEET. A soybean-oil-based product has been shown to product has been shown to provide protection for a period of time similar to a product with a low concentration of DEET (4.75%).
Insect Repellent written by Courtney J. Schoessow, MPH, Extension Program Specialist–Health, Texas AgriLife Extension Service, Texas A&M System, College Station, Texas. September 2002.
Last updated: 13 May, 2009
http://coveredbaptists.proboards.com/index.cgi?board=household&action=display&thread=1561
Got bugs?
« Thread Started on Jul 13, 2007, 12:20am »
This summer we’ve been dealing with everything from mosquitoes and fleas, to ants and spiders. I looked around for something less toxic than pesticides to use, and found this recipe:
1 cup distilled water
1 cup rubbing alcohol
5 drops peppermint oil
5 drops lavender essential oil (I used a bit more)
Mix in a spray bottle and label.
The lady I got this from said she uses it as a general household cleaner, and she hardly sees even a spider in the areas where she uses it. She thinks the lavender especially repels the critters. I made some and have been using it, and it really seems to work.
[You can substitute Vodka for the alcohol...granny]
http://coveredbaptists.proboards.com/index.cgi?board=household&action=display&thread=1562
Fly Deterrent/Repellant
« Thread Started on Jul 14, 2007, 5:39am »
My Aunt has been using this technique on her back deck, it’s covered and sort of an extension to her home in the summer...we dealt with black flies there, and big ole nasty horseflies, (my sister’s horses next door) and this works great.
She fills up ziploc sandwich bags, (almost full of water) and thumbtacks them on the deck posts and by the door...sure, they are not as pretty but the flies are gone...they don’t like the bags of water.
My Grandmom used to attach a few cotton balls to her screen door to repell the flies...they won’t come in with those either.
I feel very fortunate as we don’t have any problems with them here...and very few mosquitos...our soil’s very sandy maybe that has something to do with it..
Hope these are of help
http://coveredbaptists.proboards.com/index.cgi?board=household&action=display&thread=1560
Homemade Abrasive Cleaner like Comet
« Thread Started on Oct 2, 2006, 11:17am »
Mix equal amounts of borax, baking soda, and table salt. Store in an airtight container. When you need to use it, mix with water to make a paste over stains. Let mixture dry. Use a wet sponge or cloth to clean mixture off. The borax doesn’t come off easily, so make sure you scrub to get it all off.
I have an antique porcelain sink, and this mixture cleans it very well.
http://coveredbaptists.proboards.com/index.cgi?board=household&action=display&thread=1559
Budget cutting tip’s for ‘’Family and Home’’
While this is more general of a subject than the others, it still has a big impact on the budget. There are some things that you can do to cut costs that for me just don’t work (either I hate to do them, or they drive my husband nuts). :-) For us I try to pick and choose what works and not worry about the rest. My focus is always to be the best steward I can be.
I have found that for cleaning most of what is on the shelves in the store I can do without. I mop my floors with vinegar and water, and mix my own window cleaner. So much of what we “need” is simply believing the advertisers on TV. This does not mean that I never buy commercial cleaner. But I do pick and choose the ones I buy.
We try very hard to make both cards and presents for family and friends. I have invested in stamps, scissors, and inks and now my kids love to make cards, bookmarks, and just about anything else they can dream up. It is a case of the up front costs being worth it in the end. :-)
We also use the free email cards for every one we can. It is fun to get a card through your email (we still give most people a regular card too).
You can make all kinds of great gifts for very little. Cookies in a jar, bath salts, soup mixes, spice mixes, jellies. How about making a huge pot of spaghetti sauce, then canning it in cute jars. Add a bread mix (or loaf of fresh bread) and some spaghetti in a nice basket and you have a great gift.
Or for a family that has just had child number 4 how about a basket with different ice cream toppings, cherries, nuts, banana’s and, of course, the ice cream. It will thrill the older (well older than the newborn) family members. :-)
I love to put some thought and time into gifts.
Also look at what you do for family activities. One of our favorites is to pack a picnic and head to the Boise Green Belt. Rich fly fishes in the Boise River, the kids are all over the place on roller blades and I am loving life with whichever book I am reading. We are all doing something we love, together. And when we leave everyone is thrilled.
The only thing we pay for that night is the picnic. :-) I take used water bottles, rinse them out and freeze them half full. Then they are ready for the next outing. Or when Drew thinks he needs one to play basket ball in the driveway. Either way we are all happy. :-) At the beginning of the summer I buy a pack of them at Costco. They will last us all summer.
Also I keep a blanket and chair in the trunk of the car. You never know with our family when we will be back at the park (Rich loves to play softball and has played on teams for years). :-)
By looking at what activities we enjoy, where we spend our money, and what we truly “need” we have found ways to cut corners and make room in our budget.
One of the most important things is to stay organized. Don’t let your life take control, or maybe for most of us I should say your kids. :-)
Remember to take the time to take a bath. And your husband should get as much attention as possible. :-) We all get so busy that sometimes we forget to just enjoy the important things. Pamper yourself and your spouse, you will both notice the benefits.
I have an article about how to make different home made cleaners I would like to share. I use quite abit on this list but for my shower/tub I still use store bought. I just love Scrubbing Bubbles. It really cleans great!! Anyway, here’s the article..
This article will show you how to make your own cleaning solutions, for cleaning everything in your house. With the below homemade cleaning products, you can disinfect, shine, and clean your home, while saving money.
What you’ll need
white vinegar
water
rubbing alcohol
baking soda
olive oil
lemon juice
liquid bleach
three clean, empty, spray bottles
a sealable container (this container only needs to be able to fit a couple of cups of liquid in it, hence, can be small.)
For cleaning surfaces and tiles (non-wood surfaces)
Mix 1 cup of white vinegar with 1 cup of water, and put into a spray bottle. Label that bottle “all purpose cleaner”.
For polishing wood surfaces and furnature
Mix 1 cup of olive oil with 1/2 cup of lemon juice. Keep in a sealed container, labeled “furnature polish”.
For cleaning the toilets
Fill a spray bottle with undiluted white vinegar, and label it “toilet bowl cleaner”.
For cleaning sinks and tubs
Use baking soda as a scouring powder. For hard to clean sinks and tubs, add a little bit of water to some baking soda, to form a paste. Paint the paste onto the area you need to clean, and let sit for a half hour, then scrub it off, and re-scour with dry baking soda.
For cleaning mirrors, TV/computer screens, and glass
Mix together 1 cup of rubbing alcohol, 1 cup of water, and 1 tablespoon of white vinegar. Pour into a spray bottle, and label it “glass cleaner”.
For scrubbing hard floors
Fill mop bucket with steaming hot water, and add some liquid bleach. Read the dilution instructions on your bottle of bleach, to find out how much bleach to put into the bucket. (When you mop, open a few windows, to limit bleach fumes.)
For spot-cleaning carpets
Pour some undiluted rubbing alcohol on the spot, and rub with a wash cloth.
Using just the above, you now have all the cleaning solutions you need, to clean your whole house.
http://coveredbaptists.proboards.com/index.cgi?board=household&action=display&thread=1560
Cleaning tips and Recipes!
Kitchen
* For more effective dishwashing, add a few tablespoons of vinegar along with the dishwashing detergent when washing dishes. The vinegar cuts the grease and leaves dishes sparkling.
* To clean up spills in your oven, sprinkle the spills immediately with salt. When the oven has cooled, brush away the burnt-on food with a damp sponge.
* To disinfect smelly sponges, wash sponge thoroughly, then microwave it while it is wet, for a short period. When you see steam from the sponge, the bacteria in the sponge will be dead. Remove carefully, it will be hot! Wash the sponge thoroughly before use. **Make sure the sponge has no metal components!**
* To remove hard-water and lime build-up in a teapot or kettle, pour in two cups of vinegar and bring to a boil. Let simmer for about 10 minutes, then rinse well.
* To remove mineral deposits in a tea pot or burnt spots on a coffee pot, put some ice cubes, cut-up lemon, and salt with a tad water and swish around and let sit overnight.
* To whiten an old stained sink , poor a half cup of salt in it and then scrub it with a lemon. Let it stand for a few minutes and rinse.
* To remove skid marks on linoleum rub the spot with toothpaste before washing the floor.
* To keep your plastic containers from getting stained from tomato based foods, rub the inside with vegetable oil before placing the food in the container.
* Kitchen surfaces: Mix in spray bottle, 1 part ammonia to 3 parts water. Or try diluted bleach solution in a spray bottle. It will remove stains AND disinfect.
* Removing kitchen and food odors: Soak pure vanilla on a cotton ball and place in a saucer. Put the saucer in the car or refrigerator to remove odors. Keep cotton ball out of reach of children as it contains some alcohol.
* Odor producing mold and bacteria in garbage cans: sprinkle 1/2 cup Borax in the bottom of the garbage can.
* Cleaning coffee maker: Pour straight vinegar into it as if you are making the coffee, no filter is need. Turn coffee maker on as if you were making a pot of coffee. Repeat this with a new batch of vinegar until it runs clear of calcium deposits.
Bathroom
* Bars of soap too small to use effectively can be pressed into the sides of new bars softened by recent use.
* Shower curtains can be renovated by being washed, on gentle cycle, with a pint of white vinegar.
* If you have more than one bath to clean, keep separate cleaning supplies in each bathroom, that way you can clean the bath at a moments notice.
* To clean tubs and showers use a product that contains phosphoric acid, their is no scrubbing involved.
* Buildup on shower doors: Wipe with lemon oil. Removes buildup and keeps doors protected longer from future buildup.
* Removing mildew from shower or bath: 3 parts bleach and 1 part water — put in spray bottle. Spray on mildew areas and it will virtually disappear.
Laundry
* To remove perspiration stains in clothing, soak in warm vinegar and water.
* Microwaves can be used to emergency disinfect clothes, such as a child’s cap that another kid has put on, as long as they have absolutely NO metal in the zippers, buttons, rivets etc. ALWAYS place a cup of cold water next to the article to absorb the heat and microwave on high until the water is steaming.
* Removing mildew stains from clothes: Begin by brushing of mold outdoors so you don’t scatter mildew spores in the house. On washable fabrics, pretreat by rubbing detergent into the dampened stain. Then, launder the items in hot water, detergent and chlorine bleach, if it is safe for the fabric. If the stain remains, sponge it with hydrogen peroxide, rinse and launder. If the item isn’t bleach-safe, soak it in an oxygen bleach that is safe for colors, then wash it. Take non-washable fabrics to the dry cleaner and tell them what the stain is.
* Urine Stains: For washable fabrics that can be bleached… pre-soak them in cold water for at least thirty minutes. Launder these fabrics in hot water using detergent and chlorine bleach according to the directions on the bleach container. For washable, non-bleachable items, sponge the stained area with a solution of equal parts of household ammonia and water then launder the item in warm water and detergent. Rinse it well. For non-washable items, sponge just the stained area with clear water to which a few drops of ammonia have been added. Then, sponge with clear water only.
* Gray Dingies: One cause of the gray dingies is overloading the washing machine. When you do this, the clothes cannot move freely, resulting in poor washing and unremovable soil. To estimate the right-sized load, place dry, unfolded clothes in the washer loosely until it is about three-quarters full. Another cause is using non-phosphate detergents, particularly the granular type. If you`re using a non-phosphate detergent, use the hottest water possible and dissolve the detergent in the water before adding the clothes. If you have hard water, you might want to add about a third to a half cup of packaged water softener along with the detergent.
Misc.
*Use crumpled up black and white newspaper dipped in vinegar to wash windows. Dip paper in vinegar and wipe the glass until almost dry, then shine with dry newspaper or cloth.
*Children’s stickers can be removed from wood by applying white vinegar to the sticker, letting it soak and then sgarbageing off.
*Clean those dirty, dusty, mini-blinds in your house in a snap! Fill the bathtub with warm, soapy water and let the blinds soak. If they are white blinds add a little bleach to get rid of any stains.
*Remove spilled nail polish from wood furniture: Don’t wipe it up! The solvents in nail polish soften most finishes, and wiping may take off the finish. Instead, let the polish dry completely; then gently sgarbagee it off with a credit card. Wax the surface, using superfine steel wool.
*Use cooking or salad oil for lubricating non-essential mechanical things like hinges, tools etc. A light coat of oil will keep tools from rusting and you don’t need to buy expensive and toxic chemicals like WD-40 etc.
*To get hard water deposits off of your fixtures try some diluted muriatic acid (available at pool stores or hardware stores), but don’t store it near chlorine- they can combine and become explosive!
*Consider investing in a small rug cleaner to use for quick cleanups of pet stains and kid spills.
* If you have a busy schedule (and who doesn’t?), and hate to clean, (and who doesn’t?), make a schedule of what needs cleaning when and who will do it. If you have too much to do, consider hiring someone to come in once a month and do the chores you can’t get to.
* Run your sponges through your dishwasher every few days, and dispose of them every few weeks. They breed bacteria because they do not get the opportunity to dry out in between uses.
*If you live in a two story house, keep a second vacuum cleaner upstairs; who likes to lug those things up and down stairs? Having 2 makes it easier to whip off some vacuuming when the mood strikes.
* Wash your child’s toys after an illness to prevent reinfection or infection of another child.
* When washing windows, wipe the windows with newspaper, it won’t leave streaks.
* Don’t buy special cleaners to get out baby formula stains, use a little isopropyl alcohol on the stain, then a regular stain remover. Works like a charm.
* Cleaning ceramic tile: Regular rubbing alcohol works wonders for a ceramic floor. Just pour straight on and rub around with mop until it drys. Make sure children are not in the area during this process and have good ventilation in room.
* Removing Crayon from walls: use damp sponge and colgate toothpaste. Rub carefully.
* Removing scuff marks, pen, and pencil from walls: use a dry cloth and rubbing alcohol.
* Cleaning your carpet: Preparing for carpet cleaning? First sweep your carpet with a broom, this loosens up all the ground in dirt. Then vacuum. After that you might notice a big difference in the way your carpet looks. For wiping out stains, you can use a solution of 2 parts water one part ammonia in a spray bottle. Spray stain and wipe. For a dry cleaner use a mixture of 2 cups cornmeal and 1 cup borax. Sprinkle on carpet and let sit for one hour then vacuum. To remove pet odors, sprinkle carpet with baking soda and let sit for one hour, then vacuum.
* Make your own furniture polish: Yucky but works, take a slab of spam and rub it on your wood — wipe with pantyhose. Or, make a concoction of: 1 tsp olive oil, juice of a lemon, 1 tsp whisky or brandy, 1 tsp water. Mix together and rub on furniture with cloth, buff for a deep shine.
* Cleaning a Keyboard: On a weekly basis, carefully vacuum the keys with the round brush attachment of your vacuum. Never spray keyboard directly, spray the a cleaning cloth with all-purpose cleaning solution and wipe it with it.
* Home oil spills: Paint thinner is best for this type of spill. Pour on spill and it will dissolve oil.
* Garbage Disposal: If you’ve got a lemon that’s a little past its prime, cut it in quarters and run it through your sink disposal to freshen your drain.
* Use an alcohol(isopropyl)/water solution for cleaning mirrors. 1 part alcohol to 4 parts water. Cleans with no streaks. Coffee filters make great glass cleaning cloths.
* Dirty neck rings around shirt or blouse collars can be removed by putting shampoo on them. Rub the shampoo in like you were washing your hair. Shampoo is specifically made to remove body oils. A cheap bottle of shampoo kept by the washing machine is handy for all kinds of stains in clothing. Don’t forget this trick when you are traveling.
* For removing ink stains: Ball point pen stains can be removed by using hair spray - let the hair spray dry and wash the item. Table salt will absorb ink when it is spilled - pour salt on the wet ink and continue to add salt until there is no more “wet ink”. Then vacuum or wash. Other types of ink can be removed using rubbing alcohol.
http://www.thefrugalgirl.com/?p=2168
Home > Baking, Wednesday Baking > Whole Wheat Bread With a Twist(a quick and easy twist)
Whole Wheat Bread With a Twist(a quick and easy twist)
May 28th, 2009
Goto comments Leave a comment
Today, I’m going to share the recipe for this bread.
img_6476-1
I know I already posted a recipe for whole wheat bread, but this recipe is different because it requires no yeast. It’s a quick bread (a bread leavened with baking powder and baking soda instead of yeast), which means there’s no kneading and no rising. All you have to do is mix the dry ingredients, mix the wet ingredients, put them together, pour the batter into the pan, and bake it.
I much prefer yeast bread, both for its texture and flavor, but this is a good recipe when you’re in a pinch and don’t have time for the whole kneading-rising-shaping-rising-baking bit. And it would also be a good recipe for those of you who are scared silly at the thought of kneading bread dough.
This bread is baked in a normal loaf pan, so it can be sliced and used much like yeast bread. And while it’s not as flexible and sturdy as yeast bread, it’s a pretty good imitation.
img_6499
Quick Wheat Bread
1 1/2 cups whole wheat flour
1 cup white flour
1/2 cup quick cooking oatmeal
2 teaspoons baking powder
1/2 teaspoon baking soda
3/4 teaspoon salt
1 tablespoon finely shredded orange peel (I’ve never added this, but it might be tasty for a breakfast bread)
1 3/4 cups buttermilk or sour milk (I actually used a combo of plain yogurt and buttermilk today)
1 egg
1/4 cup brown sugar
1. Preheat oven to 350 degrees. Mix all the dry ingredients (except the brown sugar) together in a bowl. I like to use a wire whisk for this purpose.
img_6442
2. Mix the egg, milk, and brown sugar together. I do this right in the measuring cup, as you can see, and I use a traditional set of manual egg beaters. Nice and mess free. Incidentally, the recipe calls for the brown sugar to be added to the dry ingredients, but I find that it’s much easier to get rid of brown sugar lumps if you mix it with the wet ingredients instead.
img_6446
3. Add the wet ingredients to the dry ingredients, and mix gently. I cannot overemphasize this. If you mix non-yeast batters too much, you will end up with a tough, chewy product. Mix just until everything is combined, and do not feel that you must remove every single lump. Lumps are good(in this sort of bread, at least).
4. Scrape the batter into a greased 4×6 inch baking pan. I don’t grease mine, since I’m the happy owner of one 4×6 inch Gold Touch bread pan. :)
img_6453
5. Bake for 25-30 minutes, or until a toothpick inserted into the center of the bread comes out clean. Cool on a wire rack.
img_6474
This will be fairly difficult to slice neatly while it’s hot, so let it cool for at least 15-30 minutes first.
[good reviews]
http://www.thefrugalgirl.com/?cat=6
I always am hesitant to make a chocolate recipe that calls for bars of unsweetened chocolate(and many brownie recipes do). While not exorbitantly expensive, unsweetened chocolate is more pricey than cocoa powder and so I prefer not to bake with it. So, here is a unsweetened chocolate-free brownie recipe. Not only does this recipe use cocoa powder, is is also very, very easy and it yields dense, chocolatey, moist brownies(bonus: it was from a low-fat cookbook. These aren’t exactly health food, but they’re not quite as sinful as most other brownies).
I don’t know exactly how these compare price-wise to brownies from a box, but I can tell you that they taste better. ;) One day when I get really organized, I’ll do an Amy Dacyzyn style price breakdown, but for now, you’ll just have to be motivated by the picture of delicious chocolate-ness.
Frugal Brownies
5 tablespoons butter
1 1/4 cups sugar
1 cup all-purpose flour
1/2 cup unsweetened cocoa powder
1/4 teaspoon salt
1/4 teaspoon baking powder
2 eggs
1 teaspoon vanilla
1 teaspoon instant espresso powder dissolved in 1 teaspoon hot water(I hate coffee, so I just throw in a teaspoon of water)
Preheat oven to 350. Melt butter in a saucepan. While the butter is melting, mix the dry ingredients(except the sugar! That will get mixed with the melted butter later) together.
When the butter is melted, take the saucepan off the heat and stir in the sugar. The mixture will be a sandy texture.
Stir in the eggs and vanilla(the original recipe says about 40 strokes…I don’t usually count!).
Add dry ingredients to the wet ingredients and stir(the recipe says to use a wooden spoon, which I dutifully do. A metal spoon probably won’t ruin your brownies, though!) for 40 strokes(again, I don’t really count). Does this not look delicious?? At this point, I am always sorely tempted to take out a spoon and start eating.
Pour/scrape the batter into a greased 8×8 inch baking pan and bake for 20-25 minutes. When a toothpick is inserted, it should still be a little wet and gooey. This one:
is actually a little on the dry side. Err on the side of wet. ;) Cool on a wire rack and cut into squares.
Something to do with your homemade yogurt
August 1st, 2008
2 comments
or with your store-bought yogurt, for that matter!
Yogurt smoothies are by far the most common thing we do with our yogurt. A strawberry-banana one is pictured above. To make these, I put about half a quart of yogurt in my blender. I then top it with frozen fruit(most often frozen bananas and strawberries), and sometimes a bit of orange juice concentrate or a little vanilla and sugar. I blend it all up, and it turns into a lovely, creamy, frozen concoction that can actually be eaten with a spoon. If you use fresh bananas, it will be a drinkable smoothie consistency. And since most any frozen or fresh fruit can be added, this is a nice way to use up miscellaneous bits of fruit you have sitting around.
[Nice how to photos]
http://www.thefrugalgirl.com/?p=486
How to make homemade grape jelly
November 12th, 2008
Goto comments Leave a comment
This is kind of a cheater’s version, because it doesn’t involve squeezing the juice out of real grapes. While that sort of method might produce some very tasty jelly, it’s not at all cost-efficient unless you grow your own grapes or have access to free ones somehow.
How cheap your jelly is depends on the price you pay for your ingredients. If you buy grape juice and sugar on sale and you have a coupon for pectin, it will be really, really cheap. Plus, your homemade jelly will have no high fructose corn syrup in it(this is actually the reason I first looked into making my own).
I got this recipe from The Hillbilly Housewife(you can print it from the link there),(and it’s basically the same as the one on the insert from the pectin box) but I thought that some of you might be terrified of making your own jelly and would prefer a pictorial guide. ;) It’s actually really, really easy. I promise.
Homemade Grape Jelly
Here’s what you’ll need:
* 3 cups grape juice (either in a bottle or prepared from concentrate)
* 1 package powdered pectin
* 4 cups sugar
* glass jars that will hold 1.5 quarts of jelly
(they don’t need to be canning jars…glass jars that used to hold fruit or applesauce, or jelly will work fine)
Combine grape juice and pectin in a saucepan(I stir it with a whisk to get rid of the lumps) and bring to a boil. As an aside, do NOT add the sugar before you bring the pectin to a boil. I’ve done this waaaay too many times, and it causes the jelly to not, well, gel.
After the pectin/juice mixture has come to a boil, stir in the sugar. Bring it back up to a full rolling boil that cannot be stirred down, and boil for a full minute.
Remove from the heat. During cooking, some thickened foam will have probably formed on the top of your jelly. I like to skim this off, because it makes the jelly look nicer.
Pour the jelly into your jars and screw the lids on. If you want the jelly to be shelf-stable, you can process the jars in a large pot of boiling water for 10 minutes. I don’t mess with that usually…I store mine in the fridge, and they keep just fine. And actually, most of the time the heat from the jelly is enough to cause the lids on my canning jars to seal all on their own.
Sometimes, my jelly gels right away, but sometimes it takes a while(like 6-8 hours). So, don’t become distressed if at first it seems that all you have produced is some very sweet grape juice. Be patient, and as long as you’ve followed the recipe properly, your grape juice will have turned into jelly.
http://www.thefrugalgirl.com/?cat=73
Grilled Pizza-Printable
July 1st, 2009
IMG_3945
Grilled Pizza
Dough
2 tablespoons extra-virgin olive oil
1 cup water, room temperature
2 cups all purpose flour, plus more for work surface
2 teaspoons sugar
1 1/4 teaspoons salt
1 teaspoon instant yeast
Topping
1 1/2 pounds medium plum tomatoes (5 to 6), cored, seeded, and cut into 1/2-inch dice
3/4 teaspoon table salt
6 ounces mozzarella cheese , shredded (about 2 cups)
1 1/2 ounces Parmesan cheese , finely grated (about 3/4 cup)
1 recipe Spicy Garlic Oil(see bottom of page for recipe) or a thick tomato sauce
1/2 cup chopped fresh basil
You can top your pizza with other things too…bacon, mushrooms, chopped cooked sausage, and so on.
(For food processor directions, see the very bottom of the recipe.)
1) For the dough, mix the water and oil together. Combine dry ingredients in mixer bowl.
2) Add water/oil mixture and mix on low speed until combined. Beat on high speed for 3 minutes. Add more flour, a tablespoon or two at a time until the dough is thick enough to be easily kneaded.
3) Turn it out onto a floured surface and knead for 3-5 minutes. Cover with a wet towel and let rise for 1 hour.
4)While the dough is rising, mix the tomatoes and salt together in a bowl; after about a half hour there should be a decent amount of liquid in the bowl, which you should drain off.
5) Mix cheeses together and make garlic oil(if you’re using tomato sauce, you don’t need to make the garlic oil).
6) Punch the dough down, turn it out onto a floured surface, and divide into four pieces. Form each piece into a ball, placed on floured counter and press with hand to flatten. Let the balls rest for 10-15 minutes. This will relax the dough and make it easier to roll out. While the dough is resting, turn the grill on high heat.
7) After the dough has rested, roll each ball out into an 8-9 inch round that is about 1/8 inch thick.
8) Scrape the now-heated grill clean. Put a round of dough onto a pizza peel(or alternatively, you can use a floured rimless cookie sheet), and slide it onto the grill. If your grill is large enough and you feel so inclined, you can cook two at a time.
9) Cook the dough for about three minutes, checking the bottom to make sure it’s not scorching. When the bottom is nicely brown, remove it to a cookie sheet or baking peel. With the cooked side up, brush with garlic oil or thick tomato sauce, and add toppings
10) Place the pizza back on the grill, close the lid and cook for another 3 minutes or so, until the cheese is melted and the bottom crust is lightly browned. Top pizza with basil if you’re using it. Cut into slices and serve promptly.
________________________________________________________________________________________
I like to make the dough in the mixer(I usually get frustrated with making it in my food processor), but for those of you who wish to do it this way, here’s the instructions.
To make dough in food processor:
Combine dry ingredients in food processor fitted with metal blade. While the machine is running, add liquids slowly through the feed tube. Process until dough forms a ball, about 1 1/2 minutes. If dough does not form a ball, add flour 1 tablespoon at a time until ball forms. Transfer dough to a greased bowl, cover with a wet tea towel, and let rise 1 to 1 1/2 hours.
_________________________________________________________________________________________
Garlic Oil
4 medium cloves garlic, minced or pressed through garlic press (4 teaspoons)
1/2 teaspoon red pepper flakes(I used way less than this)
1/3 cup extra virgin olive oil
Cook all ingredients in small saucepan over medium heat, stirring occasionally, until garlic starts to sizzle, 2 to 3 minutes. Transfer to small bowl.
Homemade Hamburger Buns-printable
March 27th, 2009
3 comments
img_3548
Homemade Hamburger Buns
1/2 cup warm water(105 F)
2 packages(4 1/2 teaspoons) active dry yeast
3/4 cup milk
1/4 cup sugar
2 tablespoons butter or margarine
2 teaspoons salt
4 1/2-5 1/2 cups flour
2 eggs
Combine yeast and water in large mixer bowl. Let stand for a few minutes.
While the yeast and water are standing, combine milk, butter, sugar, and salt, and heat in the microwave until lukewarm(105 degrees F).
Add the lukewarm milk mixture to the yeast. Add 2 cups of flour and mix well. Add 2 eggs, and mix until combined.
The dough will be sort of like a batter at this point, so before you try to knead it, add enough flour to make a relatively stiff dough.
Turn dough out onto a floured surface, and knead until smooth and elastic. I use a bench knife to make this process easier when the dough is first being kneaded and is still rather soft.
Put it into a bowl, cover with a wet tea towel, and let rise for 1 hour.
Punch the dough down and turn out onto a floured surface. Divide into 16 equal pieces. Form each piece into a ball, and then flatten each into a disk. Place the disks onto a greased baking sheet(I have to use two sheets), cover with a wet tea towel, and let rise in a warm place for 45 minutes.
Preheat the oven to 350 degrees. Once the oven is heated, bake the buns for 12-14 minutes, or until they sound hollow when tapped on the bottom. Cool on a wire rack.
French Bread-printable
March 18th, 2009
7 comments
img_2501
Easy French Bread
makes 1 loaf
2 1/2-2 3/4 cups flour
1 teaspoon salt
1 tablespoon sugar
1 pkg(2 1/4 teaspoons) active dry yeast
1 cup warm water(120 degrees F)
In the bowl of a standing mixer, combine 2 cups flour with the salt, sugar, and yeast. Add water and beat for 3 minutes. Beat in enough additional flour to make a soft but kneadable dough.
Turn dough out onto floured surface and knead for 3-5 minutes, or until smooth and elastic. Place the dough in a bowl, cover with tea towel, and let rise 45 minutes(an hour if your house is cold).
Punch dough down and roll into a long rectangular shape. Starting from the long end, roll up jelly-roll style.
Place seam-side down on a greased baking sheet, cover with a wet tea towel, and let rise 30-45 minutes, or until doubled(it’ll depend on the warmth of your house).
Preheat oven to 400 degrees. Whisk one egg white with one tablespoon of water until slightly foamy. Using a pastry brush, gently brush beaten egg white onto loaves. Using a sharp knife, make 3-4 diagonal slashes on top of the loaf.
Bake for 15-20 minutes, or until nicely browned. Cool on a wire rack.
Deep Dish Pizza-printable
February 25th, 2009
No comments
Deep Dish Pizza
img_8625
Ingredients
1 medium baking potato (about 9 ounces), peeled and quartered
1 1/2 teaspoons active dry yeast
3 1/2 cups unbleached all-purpose flour
1 cup warm water (105 to 115 degrees)
6 tablespoons vegetable oil
1 3/4 teaspoons table salt
tomato sauce, mozzarella cheese, and whatever toppings you desire
1. Heat 1 quart of water to boiling. Add the potato, and cook for 10-15 minutes, or until tender.
When potato is cool, grate on the large holes of a box grater. Measure 1 cup of lightly packed potato(save any extra for another purpose).
2. Combine 3 cups of flour, yeast, and salt in a mixer bowl. Add warm water and two tablespoons oil(the other four tablespoons are for oiling the pans), and beat for 1 minute. Add grated potato, and beat for another 2-3 minutes. Add enough remaining flour to make a manageable dough.
Turn dough out onto a floured surface and knead for 2-3 minutes, or until smooth and elastic, adding more flour as necessary to keep the dough from sticking. Place dough in a bowl, cover with a wet tea towel, and let rise in a warm place for one hour.
3. Pour two tablespoon of oil into each of two round 9 inch cake pans. Tilt the pans to ensure even oil coverage.
Punch dough down and divide in half. Press each half into a 9 inch round, and gently place into the oiled pans. Cook’s says to let the dough rest for 10 minutes and then pat the dough up the sides of the pan. I have never been able to do this successfully(the oil makes the dough slide right back down!), but the pizzas have been fine.
4. Cover the dough with a wet tea towel, and let it rise for 30 minutes, or until soft and puffy. Meanwhile, place a pizza stone on the lower rack of the oven and heat the oven to 425 degrees. If you don’t have a pizza stone, you can instead place a rimless baking sheet on the lower rack of the oven.
5. When the crusts have risen, poke them all over with a fork, and place them in the oven on top of the pizza stone or inverted baking sheet, and bake for 5-10 minutes(I usually do 10 minutes), or until lightly browned. This will help the dough to develop some structure so that the toppings won’t make it fall and go flat.
6. Take the pizzas out of the oven and add tomato sauce, cheese, and desired toppings. Bake on pizza stone or baking sheet for another 10-15 minutes or until cheese melts. I sometimes move the pizza stone to the middle rack of the oven for this, because I have problems with my crust getting too brown if I leave it near the bottom of the oven(my oven tends to be hotter at the bottom than at the top).
7. Move the pizzas to the top rack of the oven and bake for 5 minutes, or until cheese turns spotty brown. Use a knife to loosen the pizzas from the pans, and turn out onto a cutting board. Cut into wedges and serve.
Basic Rolls-Printable
January 28th, 2009
No comments
Basic Rolls
A picture filled version with more text is here.
img_08141
Ingredients
1 cup milk
1/3 cup sugar
5 tablespoons butter, cut into chunks
1 teaspoon salt
2 packages(4 1/2 teaspoons) active dry yeast
4 1/4-4 1/2 cups all-purpose flour
2 eggs
1. Combine milk, sugar, butter, and salt in glass measuring cup or bowl. Microwave(or heat on stovetop) until the butter is melted and the mixture reaches 120-125 degrees.
2. Combine yeast and 2 cups flour in the bowl of a stand mixer. Add warm milk mixture and eggs and beat on low speed for 2 minutes. Add 1 cup of flour and beat for an additional 2-3 minutes. Mix in as much of the remaining flour as you can by hand.
3. Turn dough out onto floured surface and knead for 3-5 minutes, or until dough is smooth and elastic. Put the dough in a bowl, cover with a tea towel, and let rise in a warm place for one hour.
4. Punch dough down, divide in half, and follow instructions below to shape the rolls.
Cloverleaves: Grease a 12 cup muffin pan. Take half of the dough and divide it into 12 pieces. Cut each of these pieces in three(you will have 36 pieces). Roll each piece into a neat ball, and place three into each muffin cup.
Knots Grease a large cookie sheet. Take half of the dough and divide it into twelve pieces. Roll each into a 6 inch strip and tie into a loose knot. Place on greased cookie sheet.’
Rosettes Follow instructions for knots, but after tying the knot, tuck one end into the middle of the knot and one end underneath the knot to form a rosette shape.
5. Cover rolls and let rise in a warm place until doubled, about 30 minutes.
6. Bake in a preheated 350 degree oven for 12-15 minutes, or until lightly browned. Let cool on wire rack.
English Muffin Bread-printable
January 14th, 2009
1 comment
English Muffin Bread
6 cups all-purpose flour
1 tablespoon sugar
1 teaspoon salt
1/4 teaspoon baking soda
2 packages(4 1/2 teaspoons) active dry yeast
2 cups milk
1/2 cup water
cornmeal for dusting pans
Combine 3 cups of all-purpose flour with the yeast, sugar, baking soda, and salt in a mixer bowl.
Heat liquids to 120-125 degrees(I do this in the microwave). Add warm liquids to dry ingredients in mixer bowl, and mix for 2 minutes. It will be rather runny at this point.
Add remaining flour and beat for two minutes. The dough should be quite thick at this point.
Spray two 9×5 inch loaf pans with nonstick spray and then sprinkle with cornmeal.
My recipe says to pour the dough into the pans, but this dough is way too thick to pour. I usually try to roughly divide it in two using a metal spoon, but I normally get it wrong and have to take some dough from one pan and put it in the other. You don’t have to worry about it being pristinely neat…the lumps and bumps will straighten themselves out as the dough rises. You do want the pans to have relatively equal amounts of dough, though, or the loaves will need different baking times.
Cover with a wet tea towel(the type of towel that is not fluffy!) and let it rise in a warm place for an hour.
Bake in a preheated 350 degree oven for 25-30 minutes. Turn the loaves out of the pans and cool on a wire rack. Here’s what the finished product should look like.
Like English Muffins, this bread is at its best when it’s toasted and buttered(jelly is a good addition too). Because this dough has very little fat and sugar(which are preserving agents), it will only stay fresh for a few days on the countertop. It freezes well, though, so if you aren’t going eat it all promptly, it’s a good idea to put it in the freezer. We usually eat one loaf for dinner and then I freeze the other one to use on a busy day.
http://coveredbaptists.proboards.com/index.cgi?board=household&action=display&thread=1543
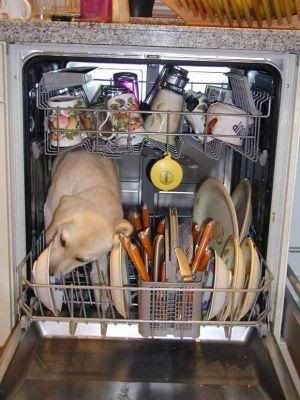
One small photo and it will show you how to use the dishwasher, when the electric is out.
I’d offer to help, but I’ve never started a thread. If you’ll tell me how, I can give it a shot.
Is that a way to get rid of fleas on a dog? I don’t know for sure, but that dog doesn’t look entirely happy about the situation... LOL...
lol
Granny said this is the way to use the dishwasher when the electricity is out.
Somewhere on this thread, she probably has a method for getting rid of fleas.
Easiest way is to get meds from the vet. Just put a couple of drops on back of the dog’s neck each month.
Hey Granny, thought I’d stop a while, have a cup of tea and visit with y’all. Have you seen this site:
I bet you can find a boatload of stuff over there.
HAHAHAHAHAHA.....
Thanks for sending this, LucyT
PING.
Granny I’d be happy to help you start a new thread. FReepmail me or something and I’ll jump in to help. If you ever want to do live chat on Yahoo I can do that too.
http://www.thesimpledollar.com/2009/07/12/review-10001-ways-to-live-large-on-a-small-budget/
Review: 10,001 Ways to Live Large on a Small Budget
Posted: 12 Jul 2009 01:00 PM PDT
Every other Sunday, The Simple Dollar reviews a personal finance book.
If you’ve been reading The Simple Dollar for a while, you’ll know that I’m a fan of WiseBread. It’s a “group” personal finance blog with a small pack of contributing writers, some of which I quite like (like Philip Brewer).
10,001 Ways to Live Large on a Small Budget is something of a compilation of the “best” of Wise Bread, along with contributions from several other top personal finance bloggers (myself included - my contribution to the book was Everything You Ever Really Needed to Know About Personal Finance, which appears on pages 199 to 205). Most of the contributions are lists of frugal ideas or other personal finance concepts, each of them actionable - the titular “10,001” comes from a liberal accounting of these tips.
The book itself comes off much like a thick magazine - glossy pages and lots of relatively short, independent articles with specific action tips.
Thus, instead of a full-on review, I just picked out ten of my favorite pieces from the book, tried to find the originals online, and offer my thoughts on them. If you like these ten pieces, you’ll likely enjoy the rest of the book.
12 Affordable Ingredients that Add Gourmet Flair to any Meal
http://www.wisebread.com/12-affordable-ingredients-that-add-gourmet-flair-to-any-meal
Contributed by Linsey Knerl
This is really an awesome list of ingredients to have on hand to make more upscale meals at home on the fly. We usually have most of these things on hand, but often we grow our own substitutes for these - for example, instead of shallots, we have green onions from our own garden.
Eight Natural Ways to Make Water More Flavorful
http://www.wisebread.com/eight-natural-ways-to-make-water-more-flavorful
Contributed by Xin Lu
Water is the ideal beverage - it’s practically free and it quenches your thirst. The only problem for many people is that it’s bland and boring - so people skip water and drink sodas or coffee or other beverages. If you’re trying to cut other beverages out of your diet for health and financial reasons, try some of these great tactics to kick boring water up a notch.
Make Your Clothes Last Longer (without spending big)
http://www.wisebread.com/make-your-clothes-last-longer-without-spending-big
Contributed by Andrea Dickson
I basically tend to wear my clothes until they’re ready to fall apart - ask my wife; sometimes, she’s not impressed with that at all. These tips do a great job of extending the lifespan of clothes, whether you choose to wear them that long or not.
25 Great Gifts for $5 or Less
http://www.wisebread.com/25-great-gifts-for-5-or-less
Contributed by Julie Rains
I find that pretty much anything homemade, if done with thought and care, can make a great gift but not cost you too much in terms of money. For example, I can make homemade dry pasta and homemade pasta sauce quite inexpensively, package them well, and it becomes a really cool gift for someone.
10 Ways to Simplify Your Budget
http://zenhabits.net/2007/05/10-ways-to-simplify-your-budget/
Contributed by Leo Babauta
Many people fail at budgeting because they make it way too complicated. The end result? They simply don’t follow through with it - it becomes a dead document that means nothing at all. Leo has some really good tips for making a budget actually work in the sonc
10 Ways for College Students to Eat for Free
http://www.wisebread.com/college-student-eating-survival-guide-until-spring-break
Contributed by Margaret Garcia-Couch
College can be tough. You’re trying to get by on pennies without racking up any more debt than you have to, and many students do this by eating cheaper. However, college has a big advantage - you can often eat for free if you plan ahead and know what you’re doing. I wish I had done things like this more often.
How to Find Savings in Every Room
http://www.wisebread.com/savings-in-every-room
Contributed by Myscha Theriault
I like tips like these. They’re simple, apply to almost everyone, and just work without too much effort or thought. I believe that many people are turned off from frugality because their first taste of it is some tip that looks like a giant time investment and without experiencing how useful frugality can be, they don’t think it’s worth it (for good reason). That’s why the best frugality tips for beginners are really simple ones, particularly ones with big bang for the buck. Why do you think I talk about light bulbs all the time?
21 Great Uses for Beer
http://www.wisebread.com/21-great-uses-for-beer
Contributed by Paul Michael
I often have really cheap beer in the fridge for various purposes (mostly because some of my guests seem to actually prefer Natural Light to a great craft beer - to each his own, I guess). Sometimes, though, I pop open a can - but not to drink it. I use it for other things, like beer batter or flavoring rice.
How to Have a Frugal Vacation and Still Treat Yourself
http://www.wisebread.com/how-to-have-a-frugal-vacation-and-still-treat-yourself
Contributed by Nora Dunn
My favorite advice for a cheap vacation is to stay with friends and family. Choose destinations where you already know people, then call them up and let them know you’re thinking of a vacation there. You might just find yourself with free housing and a very hospitable host. Of course, you should always return the favor when this comes up!
55 Ways I Saved (or Considered Saving) Time and Money Planning my Wedding
http://www.wisebread.com/55-ways-i-saved-or-considered-saving-time-and-money-planning-my-wedding
Contributed by Sarah Winfrey
A wedding can be a gigantic money suck - that’s why there are lots of lists of tips on how to save money on weddings. This is one of the most complete ones I’ve ever seen. My attitude is this: a wedding is about people, not about stuff. Don’t blow exorbitant amounts on stuff.
Is 10,001 Ways to Live Large on a Small Budget Worth Reading?
Did you find the articles above worthwhile? Does the idea of a magazine-format book seem appealing to you - a bunch of unrelated articles on money-saving topics? If you’re saying yes to both, you’ll probably find 10,001 Ways to Live Large on a Small Budget very worthwhile.
I’ll be honest, though. I’ve been a long-time reader of Wise Bread and some of the other blogs touched on in the book and I found that I’d already read most of the book. It had a very, very familiar tone for me. That doesn’t mean it wasn’t worthwhile, it just means that the best audience for this book is people who have never read Wise Bread (or other personal finance blogs) too much.
10,001 Ways to Live Large on a Small Budget has great content. I look at it as a knock-`em-dead issue of a great personal finance magazine. If that’s up your alley, check this one out.
[I do wish I could go and help them plant the golf course, by the time this thread ends, it is a full garden, onion roots, sunflowers, herbs, peanuts, the list is long.
granny]
http://mrssurvival.com/forums/index.php?showtopic=22123&hl=Replanting++Store++Bought++Onions
Honored Family Member
Group Icon
Group: Users2
Posts: 6,331
Or potatoes? Or garlic cloves?
I have an onion that has sprouted roots and all. Supposedly you can cut up potaoes into fourths and plant them for more?
Here’s my logic, I’m growing a pineapple tree from the cut off top of a pineapple. It will be years before I see a tree, but hope springs eternal.
Here’s where my crazier side comes through. The golf course I wrote about in Urban Homesteading has not sold and is still overgrown and empty. I thought about *seeding* parts of it. I KNOW noone in that neighborhood would recognize garlic or onions or such growing.
So, can it be done?? Feasible?
[thread continues, with other suggestions]
The Lord’s Prayer is 66 words, the Gettysburg Address is 286 words, there are 1,322 words in the Declaration of Independence, but government regulations on the sale of cabbage total 26,911 words. ~National Review
Disclaimer: Opinions posted on Free Republic are those of the individual posters and do not necessarily represent the opinion of Free Republic or its management. All materials posted herein are protected by copyright law and the exemption for fair use of copyrighted works.