
Posted on 04/22/2009 4:32:53 PM PDT by naturalman1975
This coming Saturday, 25th April 2009, is ANZAC Day in Australia and New Zealand - the day that these nations remember their men and women who have made the ultimate sacrifice in time of war. It is the anniversary of the day in 1915 when troops of the Australian and New Zealand Army Corps went ashore at Gallipoli, Turkey - the first time substantial bodies of troops from those two young nations (Australia 1901, New Zealand 1907) had gone into battle as soldiers of their nations, rather than purely and soley as troops of the British Empire (although they still retained that status).
It is the day our nations were baptised in blood and it is a sacred day.
This coming ANZAC Day will see approximately 3500 Australian soldiers, sailors, and airmen deployed on twelve overseas operations and to the protection of our own borders. Australian troops are currently operationally deployed to Iraq, Afghanistan, Egypt, and other areas of the Middle East, the Sudan, East Timor, and the Solomon Islands. Approximately 600 troops of the New Zealand Defence Force (Te Ope Kaatua o Aotearoa) are operationally deployed to various operational areas in the Middle East, South Pacfic, Asia, and the Pacific.
In some of these cases, these troops are serving in support of United States lead operations.
Over the next week, I intend to post a daily message in honour of these troops and those who came before them, highlighting some areas of ANZAC history. As an Australian, I know Australia's military history better than New Zealands, so I may not do theirs justice - but I invite any Kiwis here to add anything they wish to. To some extent, I especially hope to address some areas of operations that involved Americans - I understand my audience, but I think people here do respect the contributions of those of all nations who have fought for freedom, and sometimes died for it.
Courtesy of YouTube
Can You Hear Australia's Heroes Marching?
Courtesy of WikiPedia
The following two men served as soldiers and as Generals in both World Wars.
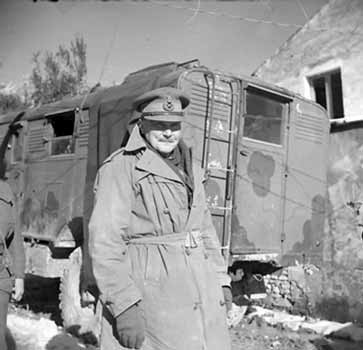
Field Marshal Sir Thomas Albert Blamey, GBE, KCB, CMG, DSO, ED (24 January 1884 – 27 May 1951) was an Australian General of the Second World War and the first, and to date only, Australian to attain the rank of Field Marshal.
As a regular soldier in the First World War, Blamey served as a staff officer at Gallipoli and on the Western Front. The pinnacle of his career was during the Second World War, as Commander-in-Chief, Australian Military Forces, serving simultaneously in international command as Commander-in-Chief Allied Land Forces in the South West Pacific Area (SWPA) under American General Douglas MacArthur. On 2 September 1945, Blamey was with MacArthur on USS Missouri and signed the Japanese surrender document on behalf of Australia. He then flew to Morotai and personally accepted the surrender of the remaining Japanese in the South West Pacific.
The seventh of ten children, Blamey was born and grew up in Lake Albert near Wagga Wagga, New South Wales. After some earlier farming failures, his father ran a small farm and worked as a drover and shearing overseer. Blamey acquired the bush skills associated with his father’s enterprises and became a sound horseman. He was a keen and efficient member of the Army Cadets at his school. He also passed a test to become a police officer.
Blamey began his working life in 1899 as a trainee school teacher in the Wagga Wagga area before moving to Western Australia in 1903 to continue his teaching career. He was involved in school cadets as a teacher at Wagga Wagga and in Western Australia.
Blamey was also heavily involved in the Methodist Church and had been since childhood. By early 1906 he was being encouraged by the Church leaders in Western Australia to enter training as a minister, which he was disposed to do.
However, upon the creation of the Cadet Instructional Staff of the Australian Military Forces he saw a new opportunity. He sat the entrance exam and came third in Australia, but failed to secure an appointment as there were no vacancies in Western Australia. After persuasive correspondence with the military authorities he was appointed to a position in Victoria with the rank of lieutenant, commencing duty in November 1906 with responsibility for school cadets in Victoria.
He was promoted to captain in 1910. In 1911, after previous candidates had failed it, he was the first Australian officer to pass the demanding entrance test for the British Staff College, which trained officers for higher command. He began his studies at the Staff College at Quetta in India in 1912, accompanied by his wife and first child. He performed very well, completing the course in 1913.
Blamey was sent to Britain for more training in May 1914, visiting Turkey (including the Dardanelles), Germany and Belgium en route. He spent a brief time on attachment to the 4th Dragoon Guards and then took up duties on the staff of the Wessex Division, at that time entering its annual camp. On 1 July 1914, he was promoted to major.
Blamey served in the First Australian Imperial Force (AIF) in the First World War. In mid-1914 Blamey had been in Britain on the staff of the Wessex Division. In November he sailed for Egypt, along with Harry Chauvel, to join the Australian contingent and became intelligence officer on the staff of the Australian 1st Division for the Battle of Gallipoli. During the landing at Anzac Cove, Blamey was sent to evaluate the need for reinforcements by Colonel M'Cay's 2nd Brigade on 400 Plateau. He confirmed that they were in such need, and the reinforcements were sent.
On the night of 13 May 1915, Blamey, in his capacity as intelligence officer, led a patrol consisting of himself, Sergeant J.H. Will and Bombardier A.A. Orchard, behind the Turkish lines in an effort to locate the Olive Grove guns that had been harassing the beach. Near Pine Ridge, an enemy party of eight Turks approached and one of them went to bayonet Orchard, so Blamey shot him with his revolver. In the action that followed, six Turks were killed. Blamey withdrew his patrol back to the Australian lines without locating the guns. Later, examination of the fuse setting on a dud round revealed that the guns were much further to the south than had been realised.
In July 1915 Blamey was given a staff appointment as a General Staff Officer, Grade 2 (GSO2), and in September 1915 he was promoted to temporary lieutenant-colonel and joined the staff of the newly forming Australian 2nd Division in Egypt as its Assistant Adjutant and Quartermaster General (AA&QMG) - the senior administrative officer of the division. Its commander, Major General James Gordon Legge preferred to have an Australian colonel in this post as he felt that a British officer might not take such care of the troops. However, after the Australian forces moved to France in 1916, a conflict between GSO1 of the Australian 2nd Division and his British commander saw Blamey return to the 1st Division as GSO1, in which capacity he was involved in the Battle of Pozières, gaining credit for the attack which captured the town.
Blamey briefly held battalion and brigade command posts in late 1916 and early 1917, but British Expeditionary Force orders forbade the use of staff college graduates in command positions. He was awarded the Distinguished Service Order (DSO) in the 1917 New Year Honours. He was promoted to brigadier-general on 1 June 1918 and became chief of corps staff of Lieutenant-General Sir John Monash's Australian Corps. He played a significant role in the success of Monash's corps in the final months of the war; Monash rated him as one of the key factors in his Corps' success in the Battle of Amiens in August and the attack on the Hindenburg Line in September. On 1 January 1918 he was appointed Companion of the Order of St Michael and St George (CMG).
Between the wars, Blamey returned to civilian life, becoming Chief Commissioner of the Victorian Police Force. He was knighted in 1935.
At the beginning of the Second World War, he returned to the Army. On 13 October 1939, Blamey was promoted lieutenant general and appointed to command the 6th Division, the first formation of the new Second Australian Imperial Force. Generals John Lavarack and Gordon Bennett also were considered for the post, and had their supporters, but Blamey was the preferred choice of Prime Minister Robert Menzies. Menzies limited Blamey's choice of commanders by insisting that they be selected from the Militia rather than the PMF.
Blamey travelled to the Middle-East with the 2nd AIF as its commander. He occasionally clashed with the British Commanders-in-Chief Middle East, General Archibald Wavell and his successor, General Claude Auchinleck, over the employment of Australian forces. He refused to allow his troops to perform police duties in Palestine, and insisted that they remain together as cohesive units, and no Australian forces were to be deployed or engaged without the prior consent of the Australian government. The government strengthened his hand by promoting him to full general, and Blamey was appointed Deputy Commander-in-Chief Middle East.
In 1942, Blamey was recalled to Australia to become the Commander-in-Chief Australian Military Forces (AMF), and then Commander of Allied Land Forces as well. Some of Blamey's most controversial actions concern the period after the Japanese declared war, and United States General Douglas MacArthur retreated to Australia.
The relationship between MacArthur and Blamey was generally good, and they had great respect for each other's abilities. MacArthur's main problem was that as Commander-in-Chief AMF, Blamey was not wholly under his command. MacArthur accepted a number of changes that Blamey made to his strategy, the most notable of which was probably moving the landing on New Britain to before the attack on Madang. The only major dispute with MacArthur that Blamey lost was his attempt to prevent the Australian 7th Division from being sent to Balikpapan in 1945, an operation that Blamey thought was unnecessary. On this occasion, Blamey was not supported by the government, and the operation went ahead as planned.
In 1943, he captured Lae with a classic double envelopment, with the 7th Division attacking from the west by air and the 9th Division from the east by sea.
On 2 September 1945, Blamey was with MacArthur on USS Missouri and signed the Japanese surrender document on behalf of Australia. He then flew to Morotai and personally accepted the surrender of the remaining Japanese in the South West Pacific. He insisted that Australia should be represented in the Allied occupation of Japan.
Blamey was abruptly retired in 1946. He returned to Melbourne, where he devoted himself to business affairs, to writing, and to promoting the welfare of ex-service personnel. In the late 1940s he became involved in 'The Association', an organisation similar to the earlier 'White Army', which was established to counter a possible communist coup. Blamey was promoted to field marshal in the King's Birthday Honours of 8 June 1950, after Menzies again became Prime Minister. Shortly afterwards, he became seriously ill and was forced to receive his field marshal's baton from the Governor-General in his hospital bed. He died of hypertensive cerebral haemorrhage on 27 May 1951 at the Repatriation General Hospital, Heidelberg, Victoria, and was cremated. Crowds estimated at 250,000 lined the streets of Melbourne at his state funeral. Ten of his lieutenant-generals served as pallbearers.
A veteran of the Mexican Revolution, he became an officer in the British Army during the First World War. Freyberg was the first soldier on the beach during the Gallipoli Campaign and the youngest general in the British Army during the First World War, later serving on the Western Front where he was decorated with the Victoria Cross. He liked to be in the thick of action — Churchill called him "the Salamander" due to his love of fire.
During the Second World War, he commanded the New Zealand Army Expeditionary Force in the Battle of Crete, the North African Campaign and the Italian Campaign. Freyberg was involved in defeat in the Battle of Greece, defeated again as the Allied commander in the Battle of Crete and performed successfully commanding the New Zealand division in the North African, including the Battle of El Alamein.
In Italy, he was defeated again at the Second Battle of Cassino as a corps commander, but later relieved Padua and Venice, and was first to enter Trieste, where he successfully confronted Tito's partisans. By the end of the Second World War, Freyberg had spent ten and a half years fighting the Germans.
Freyberg was born in Richmond, London in England, but moved to New Zealand with his parents at the age of two. He attended Wellington College from 1897 to 1904. A strong swimmer, he won the New Zealand 100-yards championship in 1906 and in 1910.
On 22 May 1911, he gained formal registration as a dentist. He worked as an assistant dentist in Morrinsville and later practised in Hamilton and in Levin. While in Morrinsville he was asked to take up a subalternship in the local Territorial Army unit, but he did not succeed in gaining the King's commission.
Freyberg left New Zealand in March 1914. Records exist of him in San Francisco and in Mexico, where he may have taken part in the civil war then raging in that country. Upon hearing of the outbreak of war in Europe in August 1914, he travelled to England.
In late 1914 Freyberg met Winston Churchill, then First Lord of the Admiralty, and persuaded him to grant him a Royal Naval Volunteer Reserve commission in the Hood Battalion of the newly-constituted Royal Naval Division.
In 1915 Freyberg became involved in the Dardanelles campaign. During the initial landings by Allied troops following the unsuccessful attempt to force the straits by sea, Freyberg swam ashore in the Gulf of Saros. Once ashore, he began lighting flares so as to distract the defending Turkish forces from the real landings taking place at Gallipoli. Despite coming under heavy Turkish fire, he returned safely from this outing, and for his action he received the Distinguished Service Order. He received serious wounds on several occasions and left the peninsula when his division evacuated in January 1916.
In May 1916 Freyberg was transferred to the British Army as a captain in the Queen's (Royal West Surrey) Regiment. However, he remained with the Hood Battalion as a seconded temporary major and went with them to France. During the final stages of the Battle of the Somme, when commanding a battalion as a temporary lieutenant-colonel, he so distinguished himself in the capture of Beaucourt village that he was awarded the Victoria Cross. On 13 November 1916 at Beaucourt-sur-Ancre, France, after Freyberg's battalion had carried the initial attack through the enemy's front system of trenches, he rallied and re-formed his own much disorganised men and some others, and led them on a successful assault of the second objective, during which he suffered two wounds, but remained in command and held his ground throughout the day and the following night. When re-inforced the next morning he attacked and captured a strongly fortified village, taking 500 prisoners. Though wounded twice more, the second time severely, Freyberg refused to leave the line until he had issued final instructions. The citation for the award, published in the London Gazette described the end result of these actions, stating that "[Freyberg] enabled the lodgement of the corps to be permanently held, and on this point the line was eventually formed" for subsequent offensives.
During his time on the Western Front Freyberg continued to lead by example. His leadership had a cost however: Freyberg received nine wounds during his service in France, and men who served with him later in his career said hardly a part of his body did not have scars.
Freyberg gained promotion to the rank of temporary Brigadier-General (although he still had the permanent rank of only Captain) and took command of a brigade in the 58th Division in April 1917, which reportedly made him the youngest general officer in the British Army. He was awarded a Companion of the Order of St Michael and St George the same year. In September a shell exploding at his feet inflicted the worst of his many wounds. When he resumed duty in January 1918 he again commanded a brigade in the 29th Division, performing with distinction during the German offensive of March–April 1918. He won a bar to his DSO in September that year. Freyberg ended the war by leading a squadron to seize a bridge at Lessines, which was achieved one minute before the armistice came into effect, thus earning him a third DSO. By the end of the war Freyberg had added the French Croix de Guerre to his name, as well receiving five Mentions in Despatches after his escapade at Saros.
Early in 1919 Freyberg was granted a regular commission in the Grenadier Guards and settled into peacetime soldiering. From 1921 to 1925 he was a staff officer in the headquarters of the 44th Division. He suffered health problems arising from his many wounds, and as part of his convalescence he visited New Zealand in 1921. On 14 June 1922 he married Barbara McLaren (a daughter of Sir Herbert Jekyll and the widow of Hon. Francis McLaren) at St Martha on the Hill. Barbara had two children from her previous marriage, and she and Freyberg later had a son, Paul, born in 1923.
In the general election of 1922 he stood unsuccessfully (coming second) as an Independent Liberal candidate for Cardiff South. He represented New Zealand on the International Olympic Committee in 1928-30.
Promoted to the permanent rank of major in 1927 (having been a substantive captain since 1916), he held a GSO2 staff appointment at Headquarters Eastern Command until February 1929 when he was promoted lieutenant-colonel and appointed to command 1st Battalion, Manchester Regiment. In 1931 he was promoted colonel (with seniority backdated to 1922) and was appointed Assistant Quartermaster General of Southern Command. In September 1933 he moved to a GSO1 posting at the War Office before being promoted major-general in July 1934.
With this promotion, at the age of only 45, he seemed headed for the highest echelons of the army. However, medical examinations prior to a posting in India revealed a heart problem. Despite strenuous efforts to surmount this, Freyberg, who was made a Companion of the Order of the Bath in 1936, was obliged to retire on 16 October 1937.
The British Army classified Freyberg as unfit for active service in 1937. However, following the outbreak of war in September 1939 he returned to its active list in December as a specially employed major-general. Following an approach from the New Zealand government, Freyberg offered his services and subsequently gained appointment as commander of the 2nd New Zealand Expeditionary Force and of the New Zealand 2nd Division.
In the chaos of the retreat from the Greek mainland campaign of 1941, London gave Freyberg command of the Allied forces during the Battle of Crete. Controversy surrounds his use of ULTRA intelligence messages during this battle.
Promoted to Lieutenant-General and knighted as a Knight Commander of the Order of the British Empire, Freyberg continued to command the New Zealand 2nd Division through the North African and Italian campaigns of the British Eighth Army. He had an excellent reputation as a divisional-level tactician. Churchill described Freyberg as his "salamander" due to his love of fire and wanting to be always in the middle of the action.
Freyberg however disagreed strongly with his superior, General Claude Auchinleck, and insisted that as a commander of a national contingent he had the right to refuse orders if those orders ran counter to the New Zealand national interest. On the other hand, Freyberg enjoyed a good relationship with General Bernard Montgomery, who thought highly of the experienced New Zealander. In the climactic Battle of El Alamein in October–November 1942, the New Zealand Division played a vital part in the Allies’ final breakthrough; for his leadership of it Freyberg was immediately upgraded to a Knight Commander of the Order of the Bath. During the ensuing pursuit of the Axis forces across North Africa to Tunisia, where they surrendered, he led the New Zealanders on a series of well-executed left hooks designed to outflank successive enemy defence lines.
Freyberg was injured in an aircraft accident in September 1944. After six weeks in hospital he returned to command the New Zealand Division in its final operations, which involved a series of river crossings and an advance of 250 miles in three weeks.
By the time of Germany’s capitulation, the New Zealanders had reached Trieste, having already liberated both Padua and Venice, where there was, briefly, a tense standoff with Yugoslav partisans. This success earned him a third bar to his DSO in July 1945, and he was also made a commander of the US Legion of Merit. By the time he relinquished command of the division, on 22 November 1945, he had accepted an invitation to become Governor-General of New Zealand – the first with a New Zealand upbringing. He left London for his new post on 3 May 1946, after being made a Knight Grand Cross of the Order of St Michael and St George. His links with the army were cut when his retirement took effect on 10 September 1946.
Following his retirement from the Army, Freyberg served as Governor-General of New Zealand from 1946 until 1952. In this post he played a very active role, visiting all parts of New Zealand and its dependencies. The Crown raised Freyberg to the peerage as Baron Freyberg of Wellington in New Zealand and of Munstead in the County of Surrey in 1951.
After his term as New Zealand Governor-General had finished Freyberg returned to England where he sat frequently in the House of Lords. On 1 March 1953 he became the Deputy Constable and Lieutenant-Governor of Windsor Castle; he took up residence in the Norman Gateway the following year.
Freyberg died at Windsor on 4 July 1963 following the rupture of one of his war wounds, and was buried in the churchyard of St Martha on the Hill in Guildford, Surrey. His wife is buried next to him and his son nearby.
The Battle of the Treasury Islands was fought between 27 October and 12 November 1943 between Allied and Japanese forces on the Treasury Islands; part of the Solomon Islands. The invasion of the islands was codenamed Operation Goodtime.
The New Zealand 8th Infantry, supplemented by United States forces, launched the invasion of the Treasury Islands at 06:06 hours on 27 October. 3,795 men landed in the assault wave with the remainder of the Allied force landing in four waves during the following 20 days. The operation was the first amphibious assault launched by New Zealand troops since the Battle of Gallipoli in 1915.
On 1 November the flag was raised over the ruins of Falamae, the islands' capital, and civil administration restored. 11 days later the islands were declared clear of Japanese forces; although Japanese holdouts were sighted in the jungles into January 1944.
The operation, in conjunction with Operation Blissful, served to divert the attention of the Japanese 17th Army from the next major Allied target in the Solomon Islands campaign. The success of the operation helped to improve the planning of subsequent landings in the Pacific.
The Spirit of ANZAC 21st April 2009
The Spirit of ANZAC 22nd April 2009
Drank myself into a stupor with one in the Aussie club at North Camp till 4 am. Saw him in the mess hall at 7am... he was the unit commander, a Major. Wanted to know if I wanted to ride along in his N model Huey for RTT (Return to Target) exercises. In an RTT two ships alternate dives at a target, covering each others climb out of a VERY steep dive. Told him sorry, but I wouldn't even do it sober. I actually did the Technicolor Yawn watching from the ground.....ahhh, the good old days.
Ozzy, Ozzy, Ozzy!...oy! oy! oy!
Disclaimer: Opinions posted on Free Republic are those of the individual posters and do not necessarily represent the opinion of Free Republic or its management. All materials posted herein are protected by copyright law and the exemption for fair use of copyrighted works.