A "possible gusset design flaw" is not much to go on. Much more useful would be the location of that gusset or gussets, as we still don't have the major components of the failure sequence in proper order yet.
Still focusing on the north end of span 5/pier 5, and/or pier six and the superstructure above pier 6 here. Both still look viable. Initial failure could have been anywhere from the midspan of span 5 through the south half of span 7 (center span), probably nearer the east side than the west.
The most interesting point on the bridge for me right now is just north of pier 6, east truss. Road deck south of pier 6, and presumably the span 6 east truss look prety good comparatively, but the span 7 east truss got hammered hard just north of pier 6.
I've isolated the SE kingpost (buckled under load) and the top chord, (folded down under moment at north end of span 6 road deck) and one other member, either a tension brace or the bottom chord, but that panel is so scattered that it's hard to piece it back together.
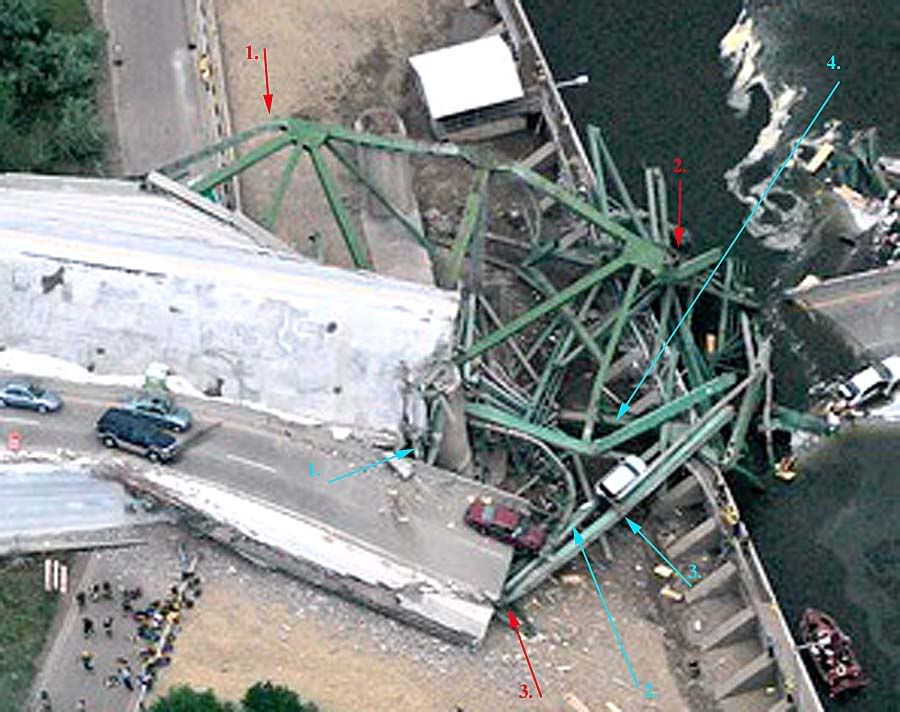
Blue arrow 1 indicates the SE kingpost, blue 2 is probably the tension brace angling north and down from the top of the SE kingpost, blue 3 is probably the east truss span 7 top chord, and blue 4 is probably the span 7 east truss bottom chord, although it may also be the diagonal tension brace if blue 2 is wrong.
Red arrows 1 and 2 seem to indicate that the top of the southwest kingpost rotated south, both bottom chords are bent consistent with this theory. So is the top chord of the pier 7 west truss, just slightly off the end of blue arrow 4.
Red arrow three indicates similar behavior of the span 7 east truss top chord.
If the center span broke free early on, its counterweight would be deprived to span 6 just south of pier 6, and would explain why the road deck was so compromised just north of pier 6.
However, the SE kingpost or other members closely associated with that panel of the east truss could easily have failed first, dropped the south end of the span 7 east truss, overloaded the south end of the span 7 west truss, and accomplished the same result.
I'm starting to consider a failure around the second or third panel of the east span seven truss, just north of the SE kingpost. That would be at the right end of the member marked with blue arrow 3. Supporting this is the position of the east truss span 7 bottom chord (blue arrow 4.), which does not appear to have leaned over eastward with the rest of the eastern truss at pier 6.
Initiating trigger or not, bad things happened there.